Android Custom View 102 (Part 12)
Sliding Menu

Let’s build a sliding menu from scratch by hand.
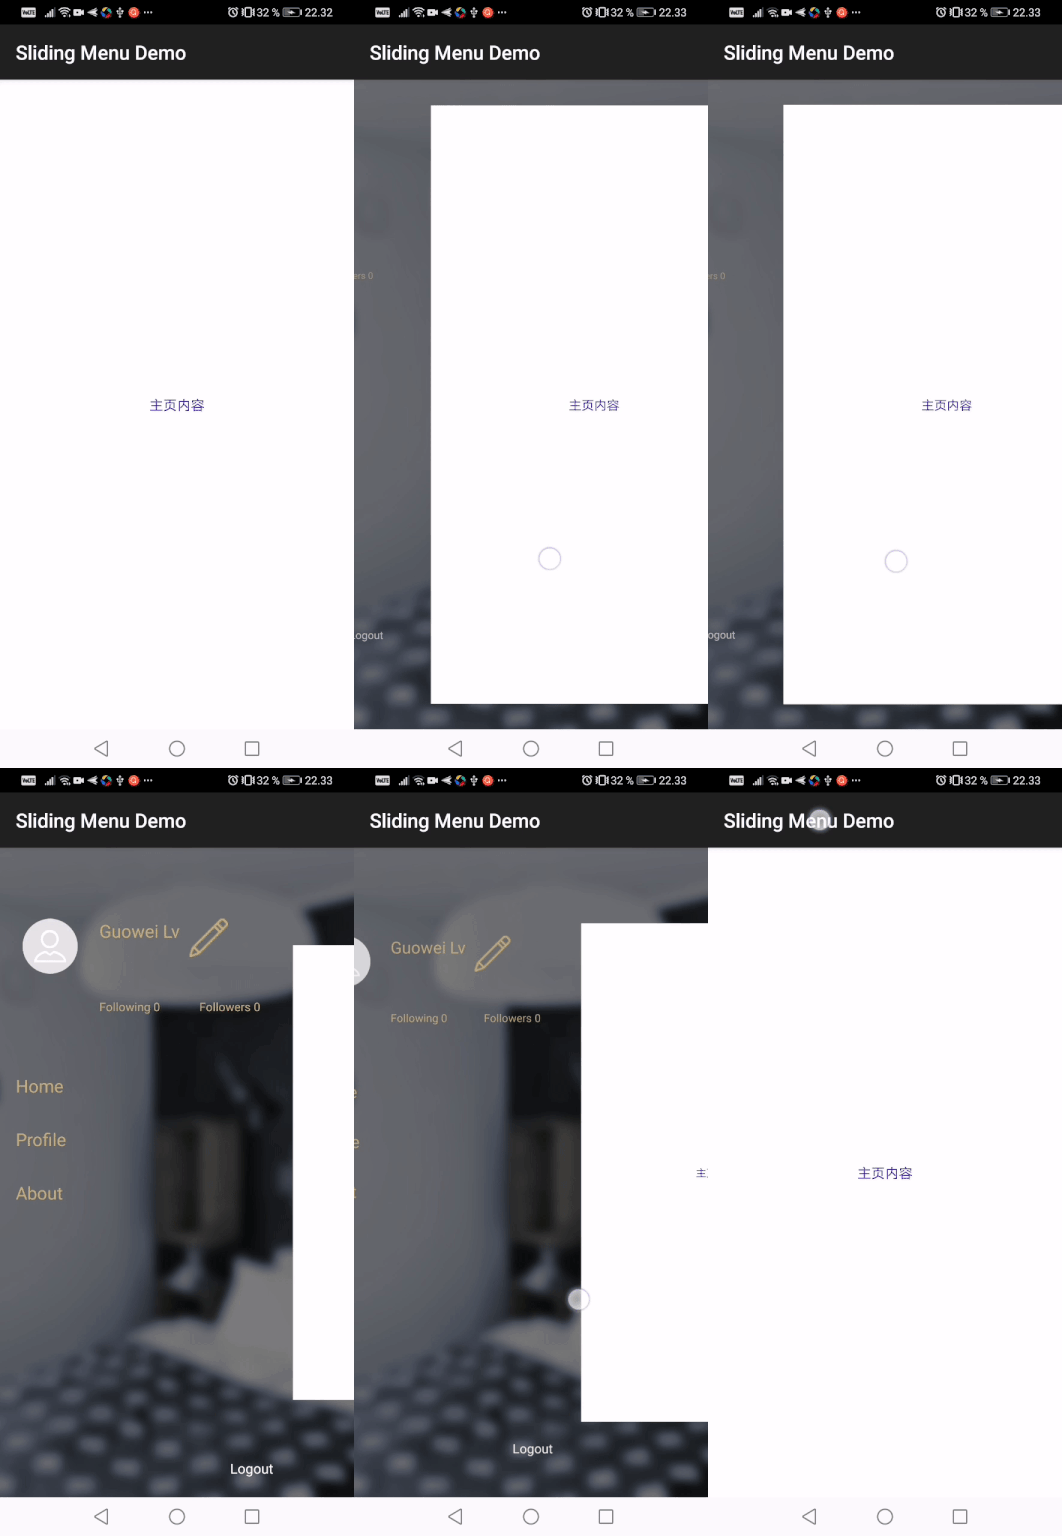
First a glimpse of what the final result looks like.

Step 1: Horizontal Scroll View
The secret is that this is just a customized HorizontalScrollView:
class SlidingMenu @JvmOverloads constructor(
        context: Context,
        attrs: AttributeSet? = null,
        defStyleAttr: Int = 0
) : HorizontalScrollView(context, attrs, defStyleAttr) { ... }
The view can be divided into 2 parts: menu view and content view, and they are just put next to each other.
The magic is that the content view has always the same width as the screen. And the width of the menu view
is the width of the screen minus some predefined margin. But the width of the screen is unknown until runtime, so
we need to override the function onFinishInflate().
/**
 * Recalculate the menu and content views' widths.
 * This has to be done in code at runtime because we want to use the screen size.
 */
override fun onFinishInflate() {
    super.onFinishInflate()
    val container = getChildAt(0) as ViewGroup

    val childCount = container.childCount
    if (childCount != 2) {
        throw RuntimeException("Must contain 2 children views")
    }

    menuView = container.getChildAt(0)
    val menuParams = menuView.layoutParams
    menuParams.width = menuWidth
    menuView.layoutParams = menuParams

    contentView = container.getChildAt(1)
    val contentParams = contentView.layoutParams
    contentParams.width = getScreenWidth(context)
    contentView.layoutParams = contentParams
}
Also, the view needs to show the content view upon opening:
override fun onLayout(changed: Boolean, l: Int, t: Int, r: Int, b: Int) {
    super.onLayout(changed, l, t, r, b)
    // scroll to content view when start
    smoothScrollTo(menuWidth, 0)
}
After this, now the view looks like:
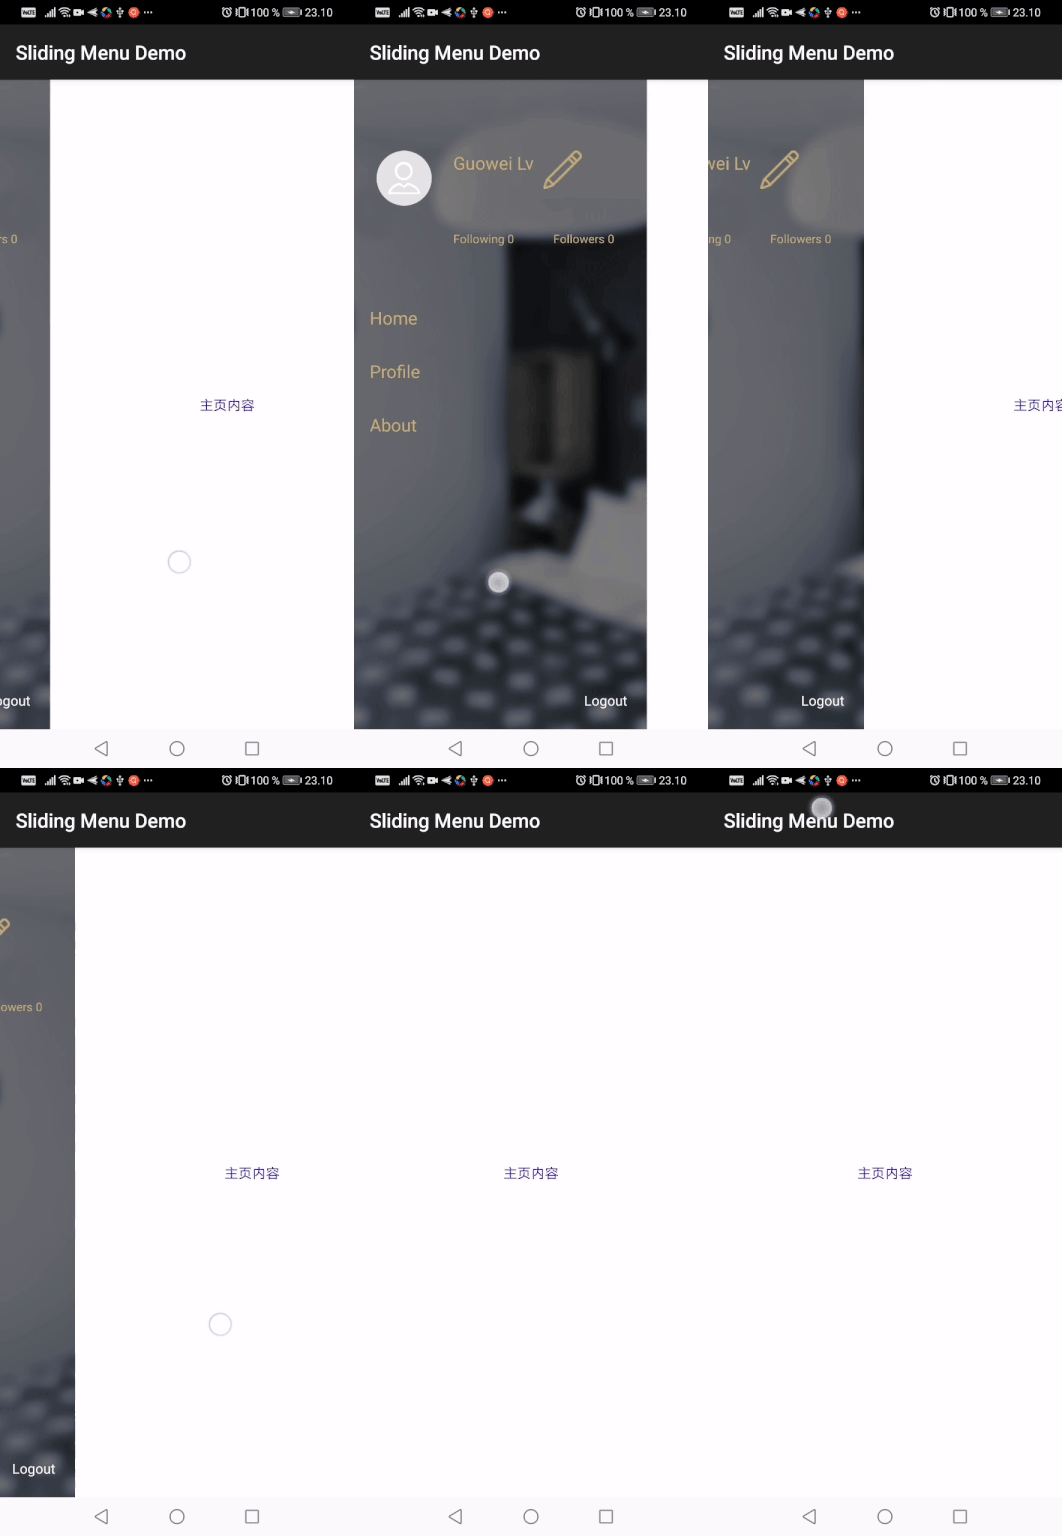
Next step is to add some animations.
Step 2: Animations
We need to add animations to both content view and menu view.
First let’s add some animation to the content view.
What we want to achieve is to scale down the content view from 1 to 0.7 in size. With this rough idea in mind let’s try it out.
 override fun onScrollChanged(l: Int, t: Int, oldl: Int, oldt: Int) {
    super.onScrollChanged(l, t, oldl, oldt)

    val scrolledPercent = 1f * l / menuWidth
    val contentScale = 0.7f + 0.3f * scrolledPercent
    contentView.scaleX = contentScale
    contentView.scaleY = contentScale
}
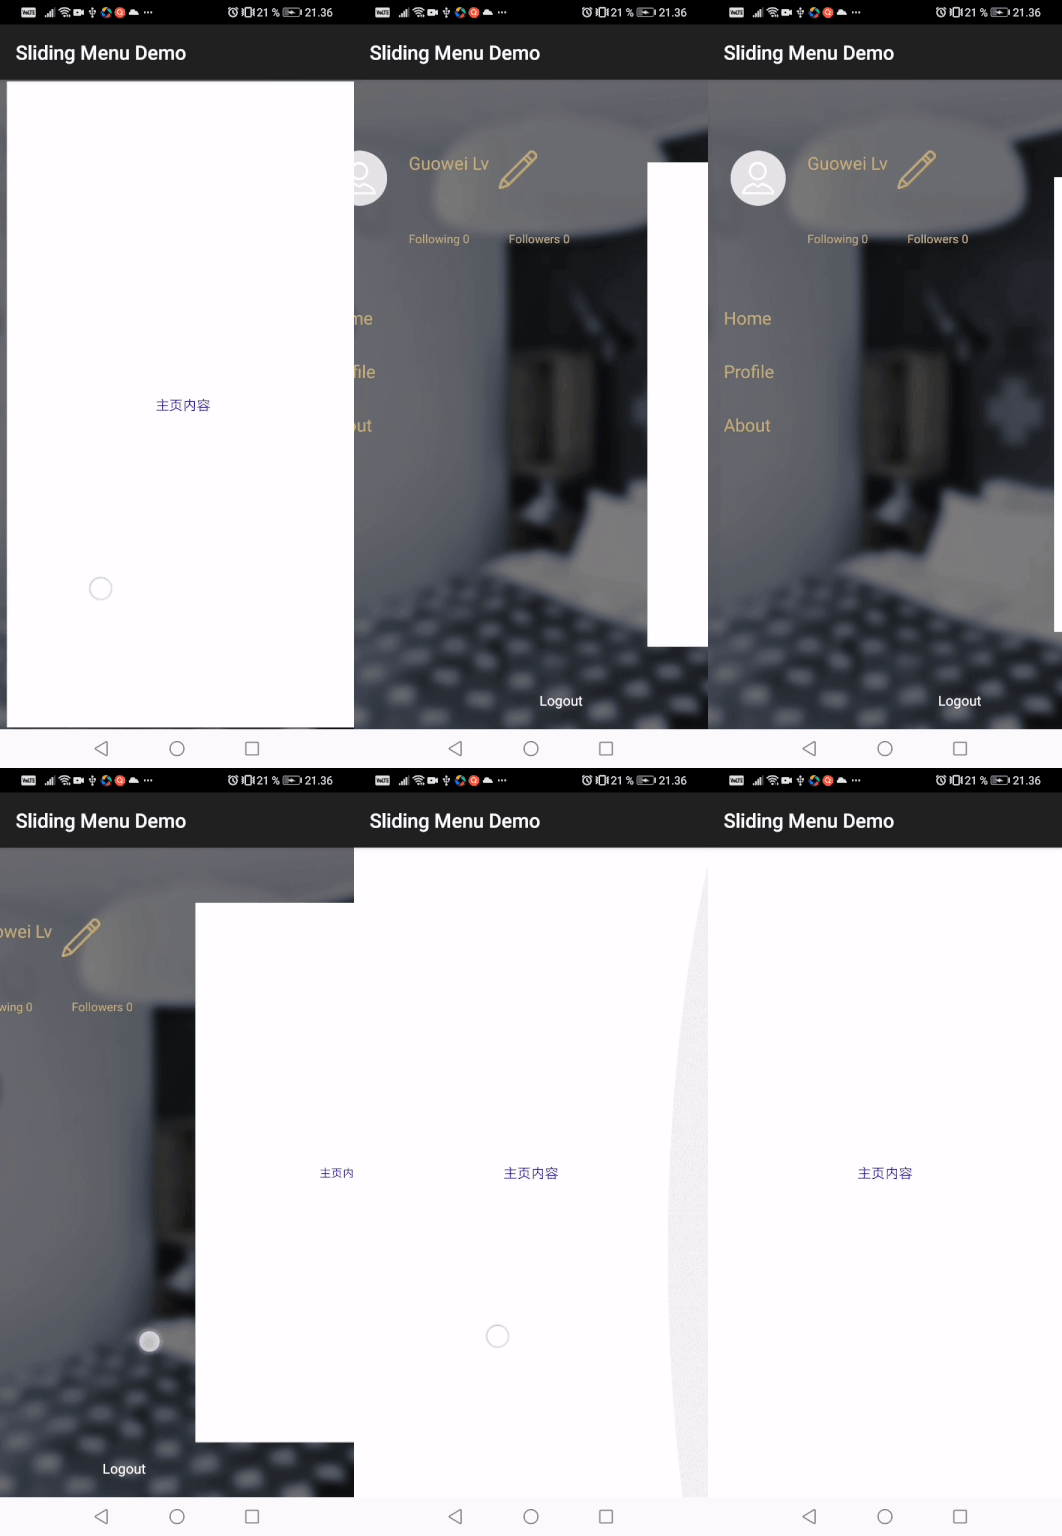
OK, this looks almost right, but not exactly. If you pay close attention, the content view is almost completely gone out of sight. The reason why this happens is that the scaling pivot point is the center of the view by default. This also cause the left edge’s position to move.
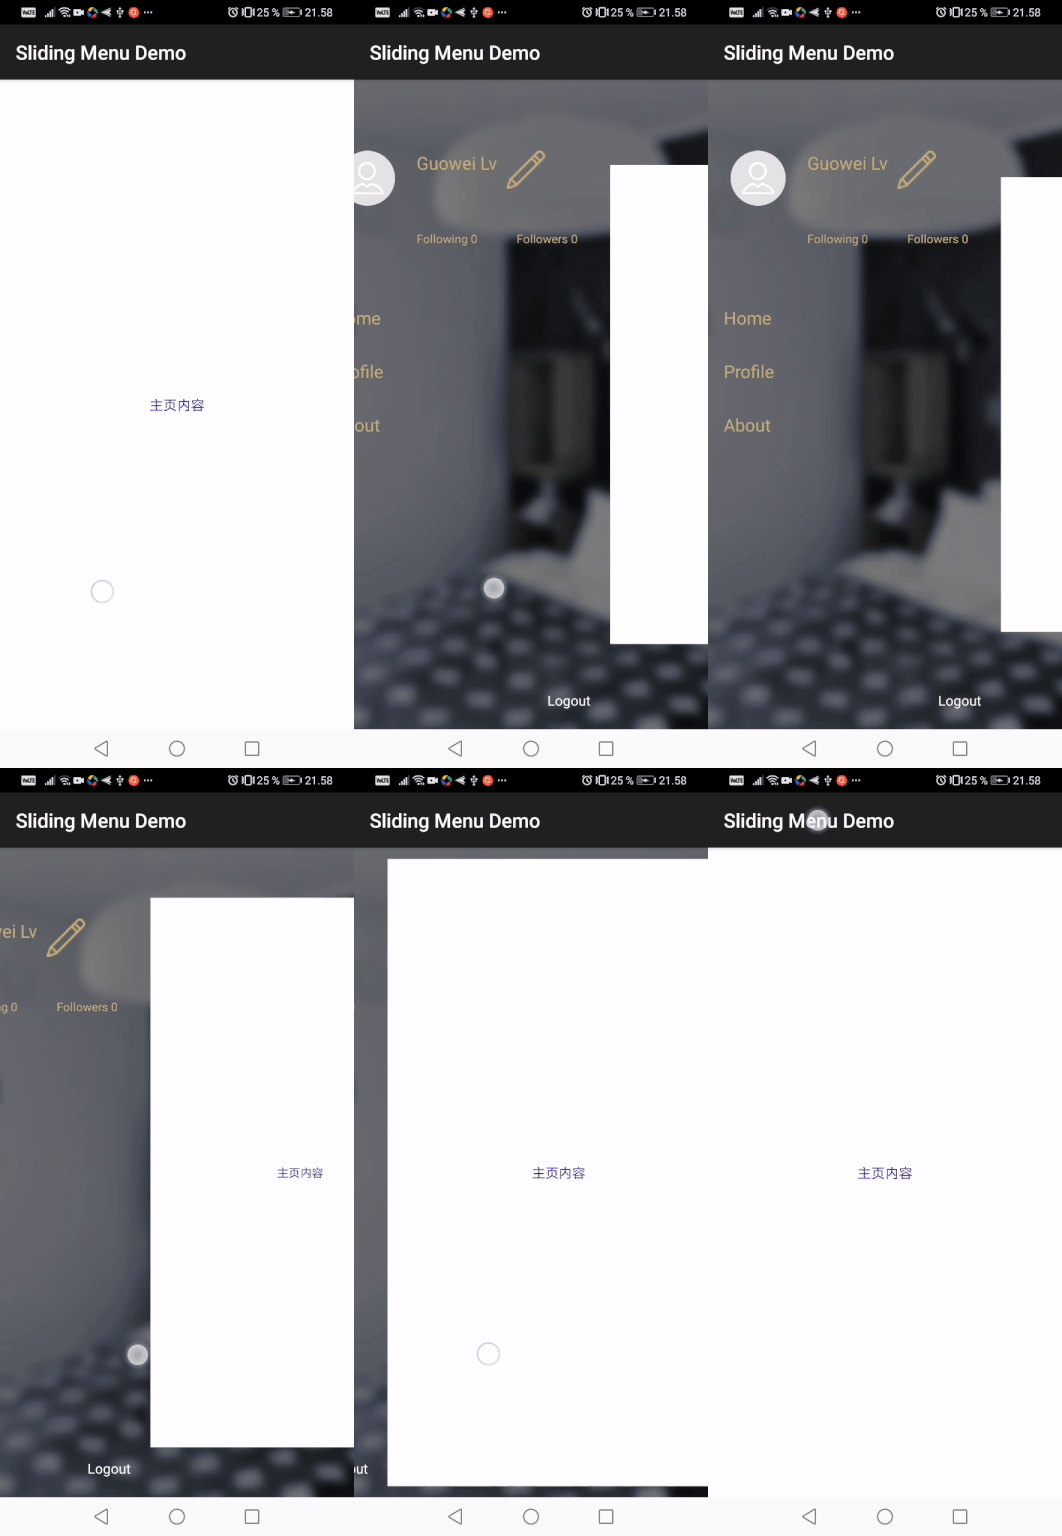
In order to fix this, we can set the pivot point of the scaling to be on the middle of the view’s left edge.
contentView.pivotX = 0f
contentView.pivotY = contentView.measuredHeight / 2.toFloat()
Now looks much better.
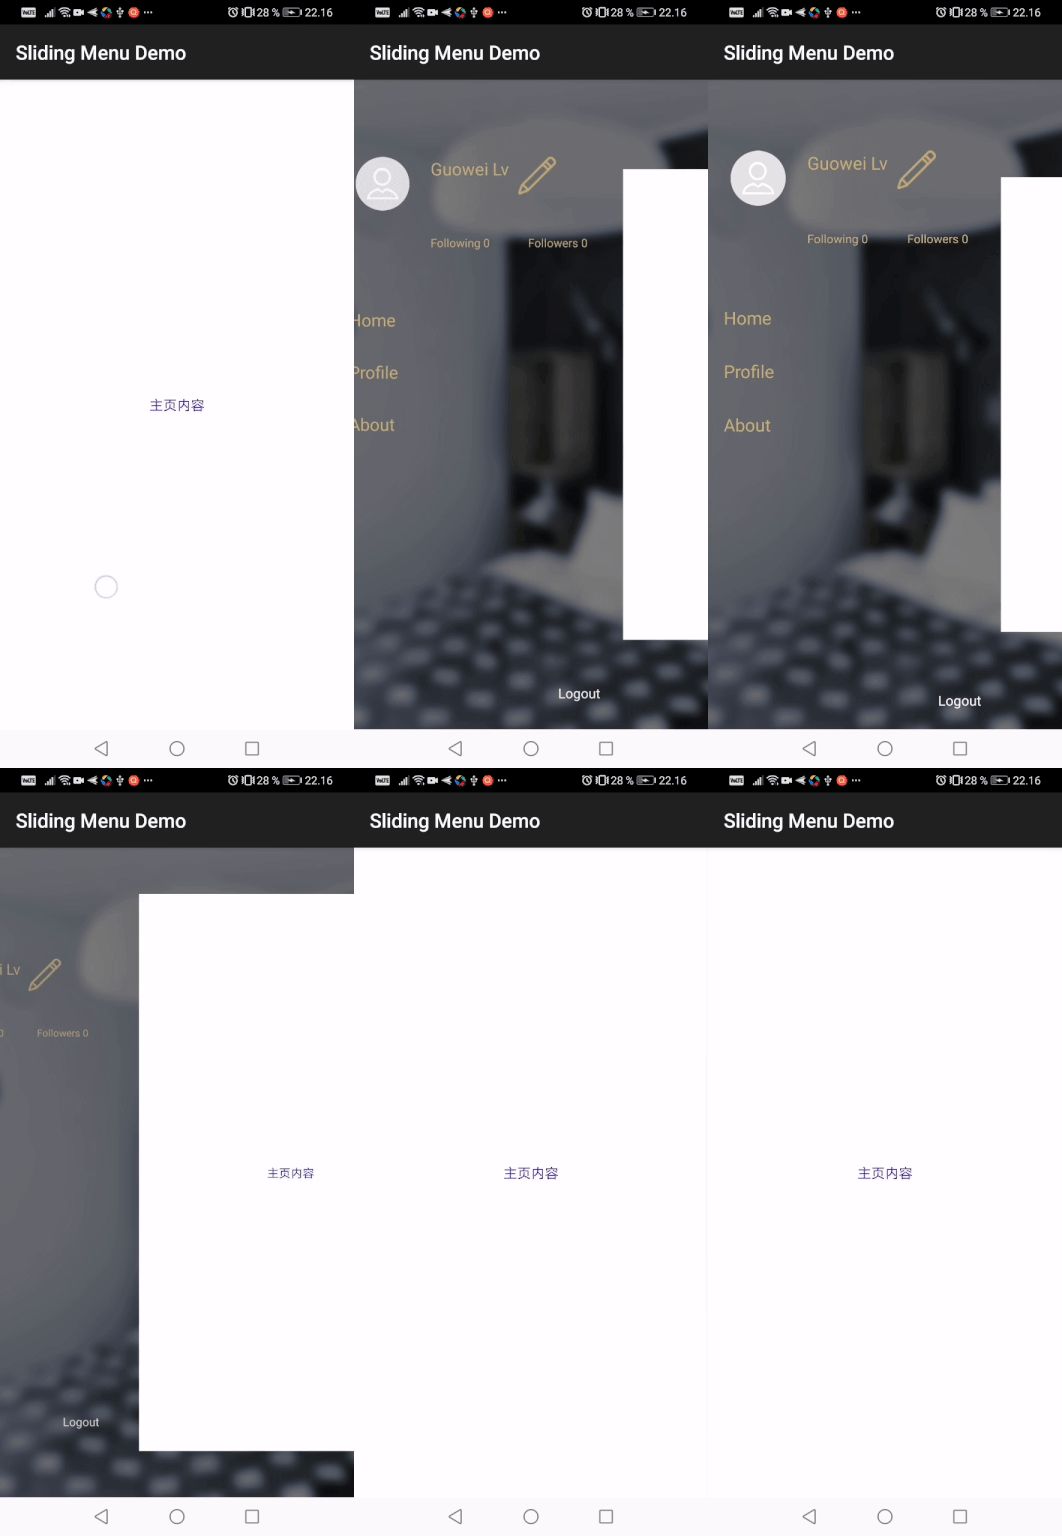
We are done with animation for content view, let’s add some similar animation for menu view: change the scale and transparency.
val menuAlpha = 0.5f + (1 - scrolledPercent) * 0.5f
menuView.alpha = menuAlpha
val menuScale = 0.7f + (1 - scrolledPercent) * 0.3f
menuView.scaleX = menuScale
menuView.scaleY = menuScale
With animations added to both views, now it looks already pretty good.
Step 3: Handle touch event
Another requirement is that when user lift finger, if the menu is less then half way shown, then close the menu, otherwise open the menu.
This can be easily done by overriding the onTouchEvent() function.
  override fun onTouchEvent(ev: MotionEvent): Boolean {
    if (ev.action == MotionEvent.ACTION_UP) {
        val currentX = scrollX

        if (currentX > menuWidth / 2) {
            closeMenu()
        } else {
            openMenu()
        }

        return true
    }
    return super.onTouchEvent(ev)
}

private fun openMenu() {
    smoothScrollTo(0, 0)
    isMenuOpen = true
}

private fun closeMenu() {
    smoothScrollTo(menuWidth, 0)
    isMenuOpen = false
}
Step 4: Handle fling event
Currently the menu may feel a bit too sticky and hard to open or close, because you have to always slide passed 50%. It is better if we can also handle the fling event, so user can close or open the menu with a quick slide gesture.
We need the help of a new class GestureDetector.
private val gestureListener: GestureDetector.OnGestureListener =
    object : SimpleOnGestureListener() {
        override fun onFling(
                e1: MotionEvent,
                e2: MotionEvent,
                velocityX: Float,
                velocityY: Float
        ): Boolean {
            if (isMenuOpen) {
                if (velocityX < 0) {
                    closeMenu()
                    return true
                }
            } else {
                if (velocityX > 0) {
                    openMenu()
                    return true
                }
            }
            return super.onFling(e1, e2, velocityX, velocityY)
        }
    }
The implementation is mostly self explanatory.
Now we can use this at the beginning of onTouchEvent():
override fun onTouchEvent(ev: MotionEvent): Boolean {

    // Note that if we detected fling event, we can let gestureDetector
    // handle it and return true here
    if (gestureDetector.onTouchEvent(ev)) {
        return true
    }
Step 5: Intercept touch event when menu is open
The last missing piece is this: when the menu is open, and user clicks on the content view, the menu should be closed and the content view should not respond to the touch event. (E.g. if user happens to clicked on some button on the upper left corner, it should not trigger anything)
To do this, we need to override the onInterceptTouchEvent():
override fun onInterceptTouchEvent(ev: MotionEvent): Boolean {
    isIntercept = false
    if (isMenuOpen) {
        val currentX = ev.x
        if (currentX > menuWidth) {
            closeMenu()

            // Note that by returning true, the child view's
            // touch event will be intercepted, but the parent
            // view's touch event is still executed.
            // So we need to mark that touch event is intercepted,
            // in order to bypass the touch event of the parent
            // view as well.
            isIntercept = true
            return true
        }
    }
    return super.onInterceptTouchEvent(ev)
}
override fun onTouchEvent(ev: MotionEvent): Boolean {
//If intercepted, skip the view's touch event
if (isIntercept) {
return true
}
...This completes this sliding view.
The full source code can be found here.

Share this post
Twitter
Google+
Facebook
Reddit
LinkedIn
StumbleUpon
Email