All You Need To Know About Android Espresso Testing (Part I)
Learn about Android Espresso Testing

The Espresso testing framework really makes it easy to write UI tests for Android. In this first installment, I will go through how to set it up and write our first test case.
Let’s get started.
Set up Espresso
Add the following dependencies to your gradle build file.
dependencies {
    // Other dependencies ...
    androidTestCompile 'com.android.support.test.espresso:espresso-core:2.2.2'
}
Understand the Rules in JUnit
Why do they exist?
We all know that in JUnit there is a setup method(annotated as @Before) and a teardown method(annotated as @After). They will run before and after each test respectively. This handles simple senarios pretty well, but it has 2 drawbacks:
-
They are two separate thing, it is very easy to do the setup work but forget to do the clean up work, what makes this worse is that if you forget to clean up, this test won’t fail, other test may fail. So it becomes very hard to track things down when tests are failing.
-
Let’s imagine that there are somUntitled designe code for setting up and tearing down the database in database tests, and there are some other code for setting up and tearing down the file handle in the file system tests. Now, what if we want to write tests that involves both file system and the database? Since we are smart, of course we create a
FileSystemAndDatabaseBaseTeststhat handles both. Well, what if we want to then write tests that involves both database and networking? Should we create another base class calledDatabaseAndNetworkingBaseTests? This certainly doesn’t scale, soon we will end up with piles upon piles of inheritance classes, because the setup and tear down works can not compose nicely. This is essentially a classic prefer composing over inheritance case.
So a Rule is basically aiming to solve these problems.
How JUnit works internally
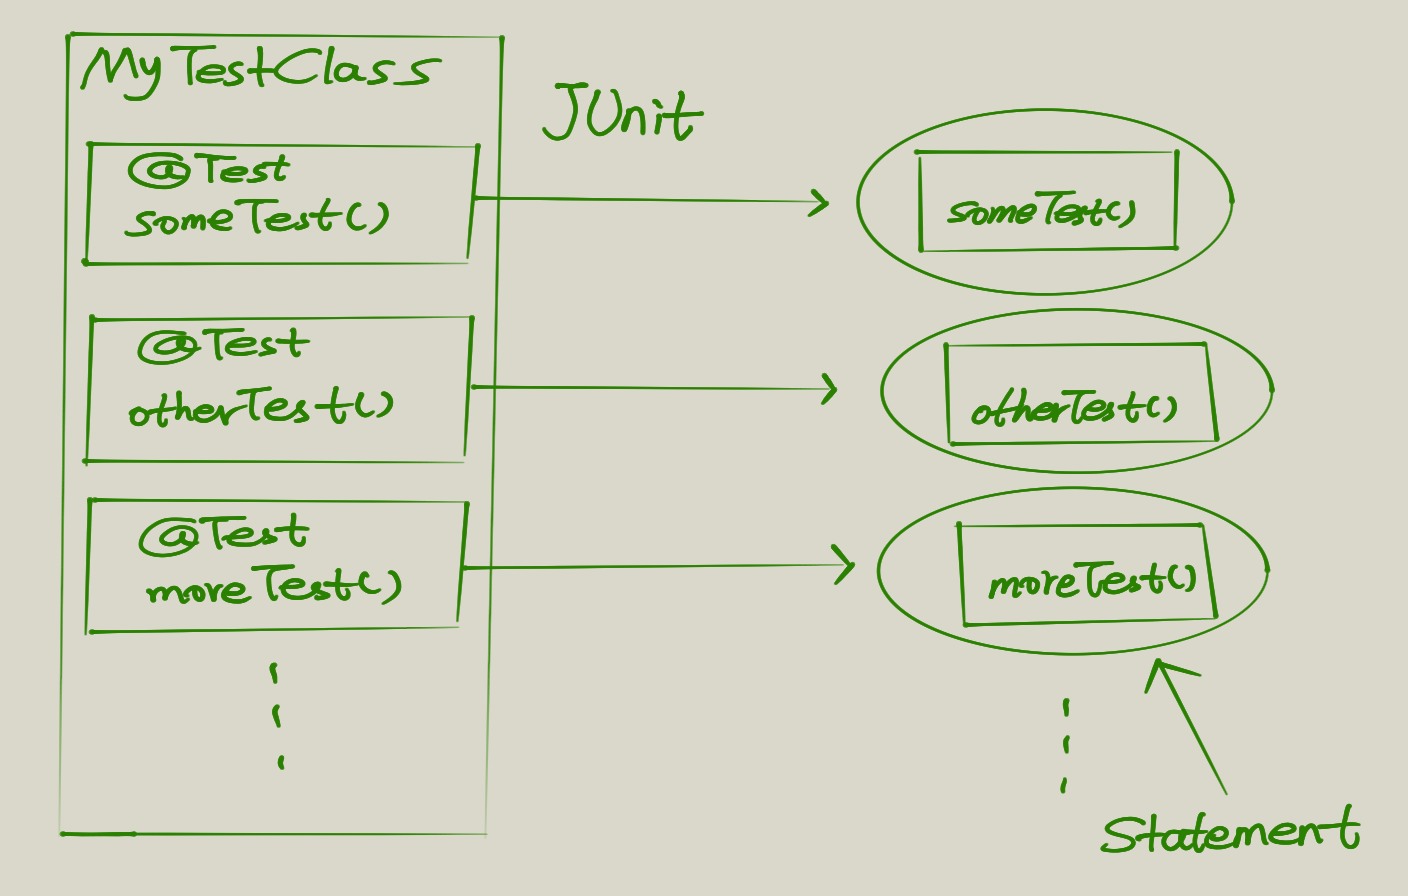
In order to understand Rules better, let’s first look at how JUnit works on a higher level.
Tests are annotated by @Test, so that JUnit can convert them into some small classes called Statement.
The Statement is a very simple class:
public abstract class Statement {
    /**
     * Run the action, throwing a {@code Throwable} if anything goes wrong.
     */
    public abstract void evaluate() throws Throwable;
}
This Statement is actually an empty base class with only one method. Looks a lot like a Command Pattern, huh?
So we can say that JUnit goes through all the functions annotated with @Test, create a bunch of command objects(Statements), and then execute them by calling evaluate().
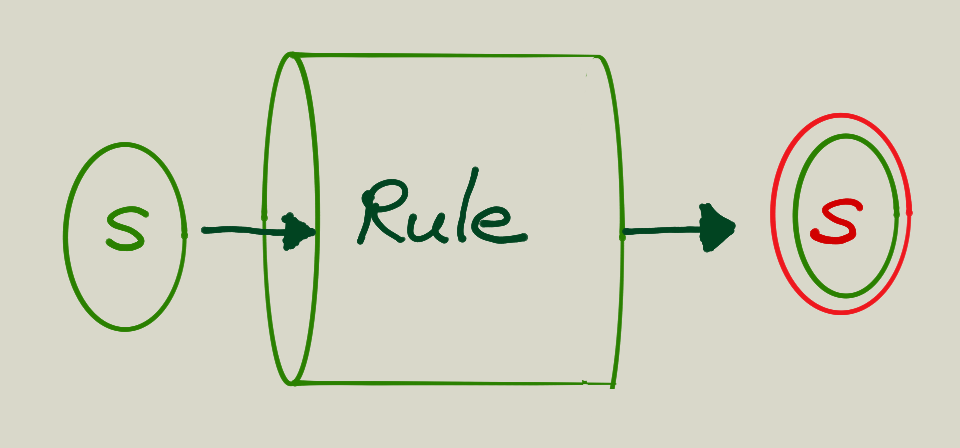
What is a Rule
Now we have a basic understanding of how JUnit creates test objects and then execute them, we can talk about where Rule kicks in.
A Rule is a kind of function (notice that in Java, since function is not first class citizen, is normally represented by an Interface), that takes a Statement in, and returns a Statement back.
Now let’s take a look at the code:
public interface TestRule {
/**
* Modifies the method-running {@link Statement} to implement this
* test-running rule.
*
* @param base The {@link Statement} to be modified
* @param description A {@link Description} of the test implemented in {@code base}
* @return a new statement, which may be the same as {@code base},
* a wrapper around {@code base}, or a completely new Statement.
*/
Statement apply(Statement base, Description description);
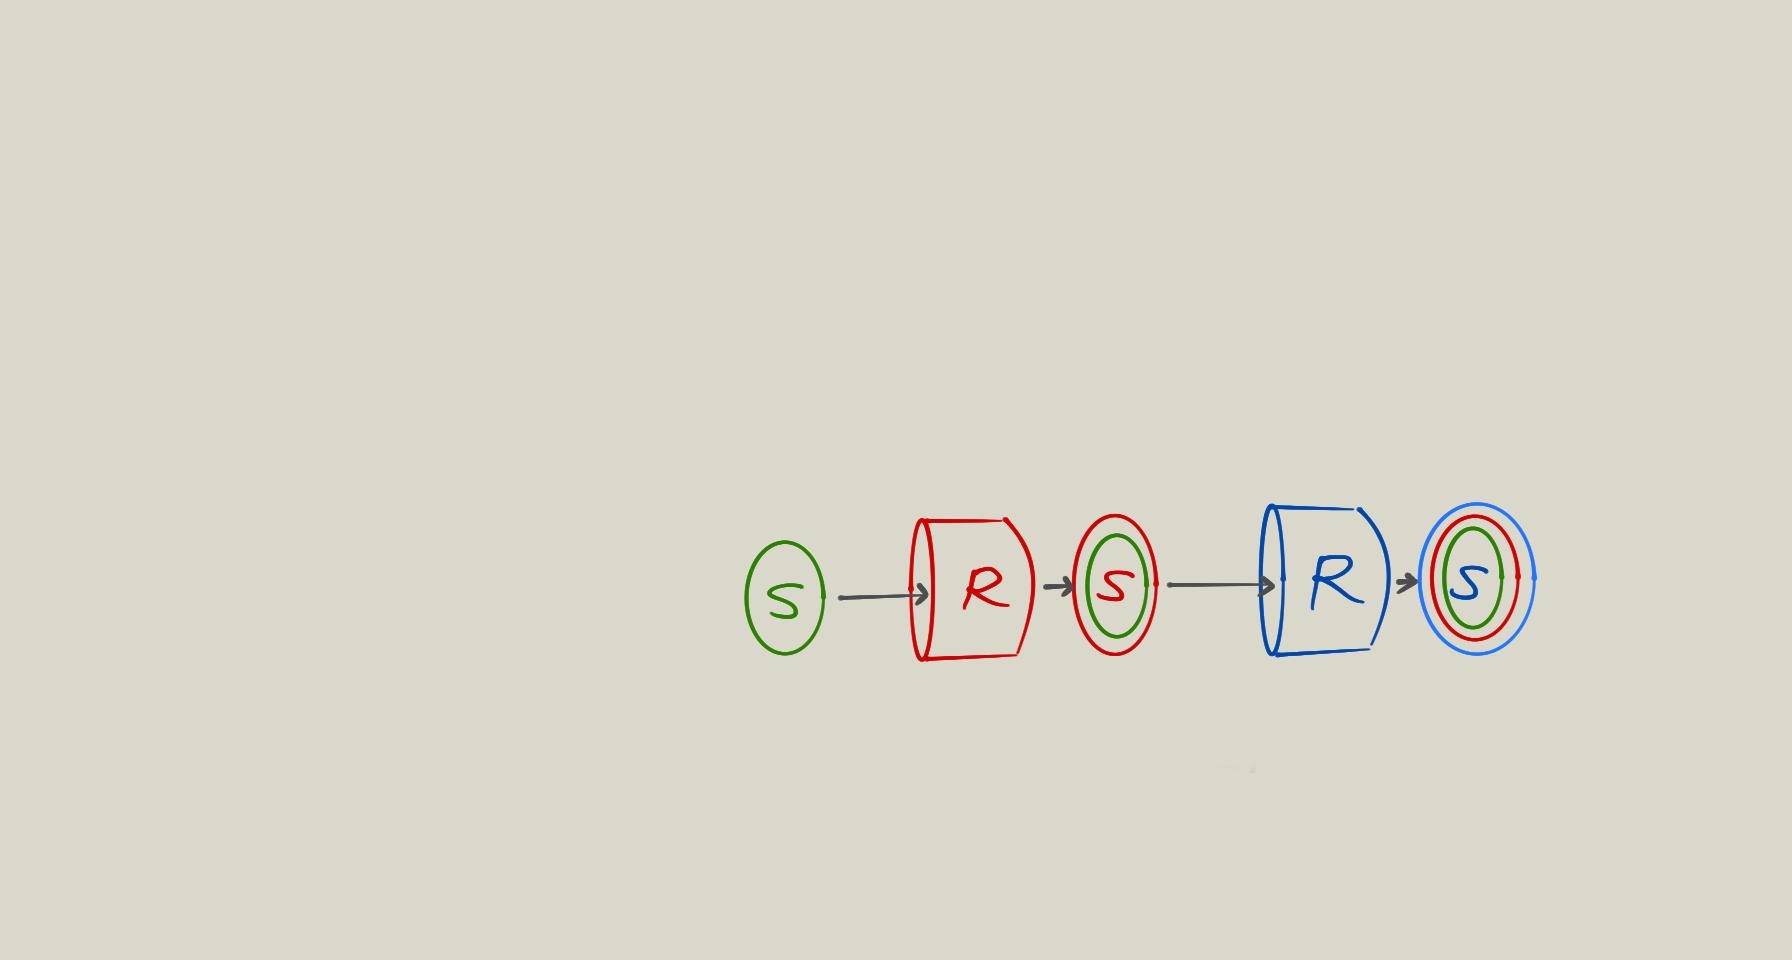
}From the comments we can probably guess that this is a Decorator Pattern. It provides a way to do extra work before or after the original test, aka a single place to do both before and after work. And the best part is that it is even composable like this:
To understand this better, let’s implement a Rule.
public class SampleRule implement TestRule {
    public Statement apply(final Statement s, Description d) {
        return new Statement() {
            public void evaluate() throws Exception {
                // do more before test run here
                s.evaluate();
                // do more after test run here
            }
        }
    }
}
In the sample code, we have now a place to very easily put in extra logic before and after the test run.
Add the activity test rule
@Rule
public ActivityTestRule<MainActivity> rule = new ActivityTestRule<>(MainActivity.class);
This rule basically launches and specified activity before test, and destroy it after test, so we don’t have to set this up ourselves.
A simple test case
Now we can start writing our first test case, which is as simple as checking some string is displayed.
@Test
public void shouldBeAbleToLaunchMainScreen() {
    onView(withText("Hello World")).check(ViewAssertions.matches(isDisplayed()));
}
There are 3 parts for every espresso test: onView, perform and check. onView makes sure that the view is on the screen before we proceed with the test. perform allows simulating some user input on the view, and check is checking the final state the view is in.
There is a cheat sheet that is quite useful.
Using uiautomatorviewer
Notice that in the previous test, we find the view by making a text match, this has several problems. The text can change quite often and what if the app is internationalized? All these makes the test to be fragile. We can eliminate these shortcomings by using the view’s id. But finding the view’s id can be cumbersome. Here is what uiautomatorviewer can help. Using it, we can very quickly access the view’s information including its id. Launch it (in ANDROID-SDK-PATH/Sdk/tools/bin/) and should be easy to figure out how to use it.
Share this post
Twitter
Google+
Facebook
Reddit
LinkedIn
StumbleUpon
Email