Android Custom View 102 (Part III)
Geometric Transformations

In this post, we will be focusing on what canvas can do.
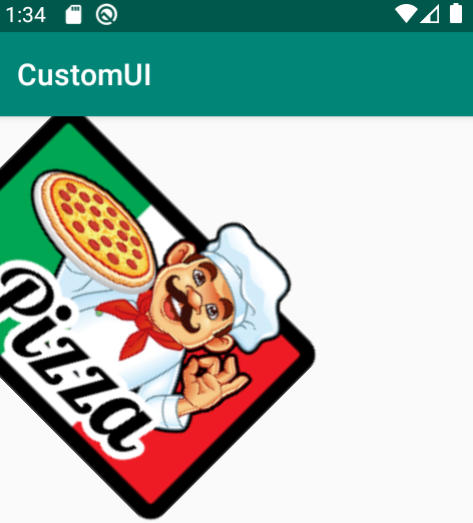
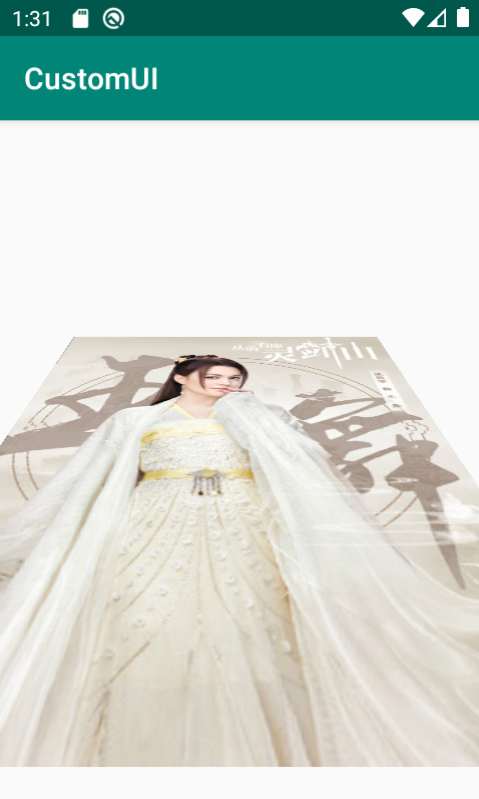
To demonstrate the effects, I simply created custom view that draws an image. The original verion is like this:

Clip
Clipping is easy to understand, it’s like cut the view in a certain way so that only part of it is shown.
There are 2 methods: clipRect() and clipPath().
clipRect()
This method will clip the view using a rectangle.
For example, the following code will clip the image using a 100x100 rectangle.
@Override
protected void onDraw(Canvas canvas) {
    super.onDraw(canvas);
    canvas.save();
    canvas.clipRect(100, 100, 200, 200);
    canvas.drawBitmap(image, 0, 0, paint);
    canvas.restore();
}
One thing to pay attention to is the use of canvas.save() and canvas.restore(). This basically saves the canvas’s state before clipping and restores its state after clipping. If we do not do this, then every draw after the canvas.clipRect() will be clipped.
clipPath()
This method will take a Path as an parameter, so that it can clip using all kinds of shapes.
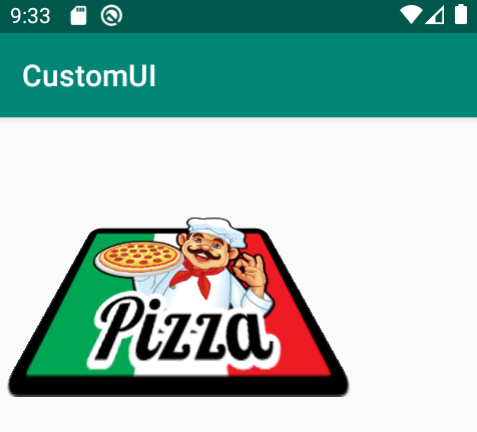
For example, we can clip using a heart shaped path:
private void init() {
    paint = new Paint();

    // A heart shaped path
    path = new Path();
    path.addArc(100, 100, 200, 200, -225, 225);
    path.arcTo(200, 100, 300, 200, -180, 205, false);
    path.lineTo(200, 280);

    image = BitmapFactory.decodeResource(getResources(), R.drawable.pizza);
}

@Override
protected void onDraw(Canvas canvas) {
    super.onDraw(canvas);
    canvas.save();
    // clip by path
    canvas.clipPath(path);
    canvas.drawBitmap(image, 0, 0, paint);
    canvas.restore();
}
Geometric transformation
There are 3 ways to do geometric transformation:
- Use
canvasto do common 2D transformation - Use
Matrixto do common/uncommon 2D transformation - Use
Camerato do 3D transformation
Using Canvas to do 2D transformation
Translate
Translate here basically means to move.
For example, the following example moves the image 100px to the right.
@Override
protected void onDraw(Canvas canvas) {
    super.onDraw(canvas);
    canvas.save();
    canvas.translate(100, 0);
    canvas.drawBitmap(image, 0, 0, paint);
    canvas.restore();
}
Rotate
Rotate 45 degrees using the the point (100, 100) as pivot.
@Override
    protected void onDraw(Canvas canvas) {
        super.onDraw(canvas);
        canvas.save();
        canvas.rotate(45, 100, 100);
        canvas.drawBitmap(image, 0, 0, paint);
        canvas.restore();
    }
Scale
Scale the image 1.5 times larger, using the middle of the image as the pivot point.
@Override
protected void onDraw(Canvas canvas) {
    super.onDraw(canvas);
    canvas.save();
    canvas.scale(1.5f, 1.5f, image.getWidth() / 2, image.getHeight() / 2);
    canvas.drawBitmap(image, 0, 0, paint);
    canvas.restore();
}
Skew
Skew 0.5 times on the y axis:
@Override
protected void onDraw(Canvas canvas) {
    super.onDraw(canvas);
    canvas.save();
    canvas.skew(0, 0.5f);
    canvas.drawBitmap(image, 0, 0, paint);
    canvas.restore();
}
These transformations can be used in combination. But we have to pay special attention to the ordering. For example, suppose we want to translate the image 100px to the right, and then rotate on the center point of the image. Then we have to write the rotate first and then translate.
@Override
protected void onDraw(Canvas canvas) {
    super.onDraw(canvas);
    canvas.save();
    canvas.rotate(45, image.getWidth() / 2 + 100, image.getHeight() / 2);
    canvas.translate(100, 0);
    canvas.drawBitmap(image, 0, 0, paint);
    canvas.restore();
}
If we write translate first, then we will get the wrong result. (The image will rotate based on the wrong pivot point).
Matrix
Using Matrix to do common 2D transformations
There are 3 steps:
- Create the
Matrixobject - Use its
pre/postTranslate/Rotate/Scale/Skew()methods to do the transformations - Call
canvas.setMatrix(matrix)orcanvas.concat(matrix)to apply the transformations
Matrix is capable of doing what do did using canvas. For example, we can use Matrix to implement the translate + rotate.
private void init() {
    paint = new Paint();
    matrix = new Matrix();

    image = BitmapFactory.decodeResource(getResources(), R.drawable.pizza);

    matrix.reset();
    matrix.postTranslate(100, 0);
    matrix.postRotate(45, image.getWidth() / 2 + 100, image.getHeight() / 2);
}

@Override
protected void onDraw(Canvas canvas) {
    super.onDraw(canvas);
    canvas.save();
    canvas.concat(matrix);
    canvas.drawBitmap(image, 0, 0, paint);
    canvas.restore();
}
Note here by using the postTranslate() and postRotate() the ordering now is not reversed anymore. There are also preTraslate() and preRotate(), please refer to the doc to learn more.
Some words about the two methods to apply the matrix. setMatrix() is to replace the current canvas’s transformation with the one provided by the matrix, while concatMatrix() is to add the matrix transformation onto the current canvas transformation. But, I heard that the setMatrix() method has different behaviors on different versions of Android, so my personal recommendation is to use concat(matrix).
Use Matrix to do custom 2D transformation
Think of this as if you can stretch and squeeze the canvas.
Let’s see an example:
private void init() {
    paint = new Paint();
    matrix = new Matrix();

    image = BitmapFactory.decodeResource(getResources(), R.drawable.pizza);

    matrix.reset();
    float pointsSrc[] = {0, 0, image.getWidth(), 0, 0, image.getHeight(), image.getWidth(), image.getHeight()};
    float pointsDst[] = {100, 100, image.getWidth() - 100, 100, 0, image.getHeight(), image.getWidth(), image.getHeight()};
    matrix.setPolyToPoly(pointsSrc, 0, pointsDst, 0, 4);
}
In this example, the 4 source points are mapped to the 4 destination points. The effect is like the top of the image gets squeezed. This also has an interesting 3D feel.
Camera 3D transformation
First thing first, we need to give the x, y and z axis that the camera uses.
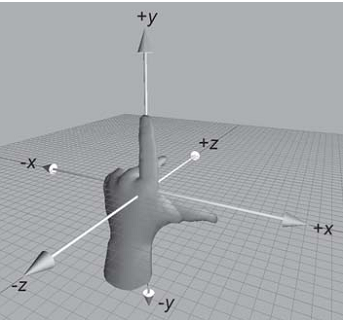
Note that the z axis is a bit different. Going into the screen is positive, going out from the screen is negative. And the camera is located on the z axis negative part somewhere.
Rotate
There is camera.rotateX(), camera.rotateY() and camera.rotateZ(). To understand them, let’s see an example: rotate x by 30 degrees.
@Override
protected void onDraw(Canvas canvas) {
    super.onDraw(canvas);
    canvas.save();

    camera.save(); // save camera's state
    camera.rotateX(30);
    camera.applyToCanvas(canvas); // project the rotation to canvas
    camera.restore(); // restore camera's state

    canvas.drawBitmap(image, 0, 0, paint);
    canvas.restore();
}
Seems that it is not symmetric. The next picture explained why so.
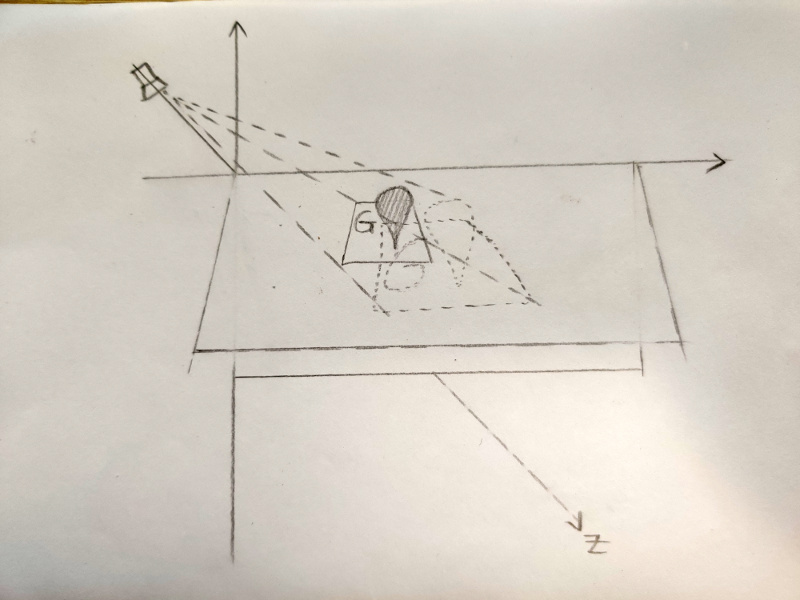
As you can see, the camera is located on the z axis, when the xy plane gets rotated, the camera is not directly on top of the image. That’s why the projection looks a bit tilted.
In order to do the rotation as if the camera is directly on top of the image, we have to do the following steps:
- Move the image to the origin point.
- Project the camera rotation to canvas.
- Move the image back to where it used to be.
Now let’s see if things looks better:
@Override
protected void onDraw(Canvas canvas) {
    super.onDraw(canvas);
    canvas.save();

    camera.save();
    camera.rotateX(30);
    canvas.translate(image.getWidth() / 2, image.getHeight() / 2); // step 3
    camera.applyToCanvas(canvas); // step 2
    canvas.translate(-image.getWidth() / 2, -image.getHeight() / 2); // step 1
    camera.restore(); // restore camera's state

    canvas.drawBitmap(image, 0, 0, paint);
    canvas.restore();
}
This now looks like what we expected.
Pay attention that the transformations added to canvas is in reverse order.
Camera location
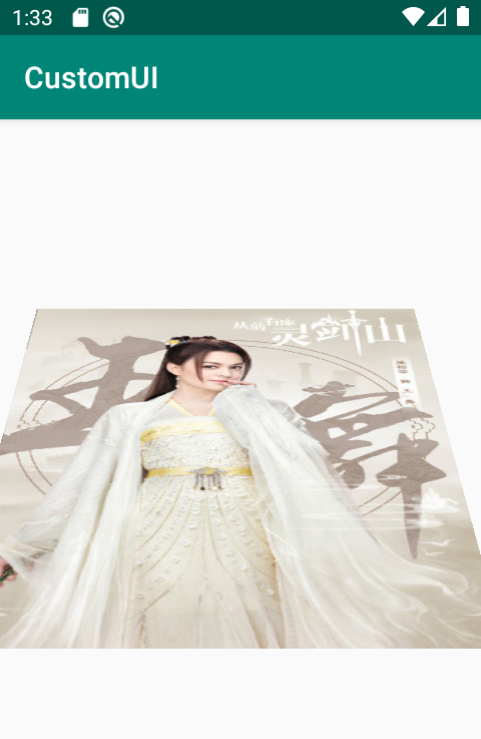
Sometimes the image is big, after rotation, it can become too close to the screen. For example:

After rotate 60 degs it becomes
To remedy this, we can pull back the camera a bit by setting its z.
@Override
protected void onDraw(Canvas canvas) {
    super.onDraw(canvas);
    canvas.save();

    camera.save();

    camera.rotateX(60);
    // default position is (0, 0, -8)
    camera.setLocation(0, 0, -20);
    canvas.translate(image.getWidth() / 2, image.getHeight() / 2);
    camera.applyToCanvas(canvas);
    canvas.translate(-image.getWidth() / 2, -image.getHeight() / 2);
    camera.restore();

    canvas.drawBitmap(image, 0, 0, paint);
    canvas.restore();
}
Note that the unit of camera position is inch. And 1 inch = 72 pixels.(this is hard coded btw, yes I know …)
Exercise
Implement the folded card effect:

Answer:
public class CustomView extends View {

    private Paint paint;
    private Bitmap image;
    private Camera camera;
    private int degree;

    private void init() {
        paint = new Paint(Paint.ANTI_ALIAS_FLAG);
        camera = new Camera();
        image = BitmapFactory.decodeResource(getResources(), R.drawable.wanglu);
        degree = 45;

    }

    public CustomView(Context context) {
        super(context);
        init();
    }

    public CustomView(Context context, @Nullable AttributeSet attrs) {
        super(context, attrs);
        init();
    }

    public CustomView(Context context, @Nullable AttributeSet attrs, int defStyleAttr) {
        super(context, attrs, defStyleAttr);
        init();
    }


    @Override
    protected void onDraw(Canvas canvas) {
        super.onDraw(canvas);


        int imageWidth = image.getWidth();
        int imageHeight = image.getHeight();
        int centerX = getWidth() / 2;
        int centerY = getHeight() / 2;
        int x = centerX - imageWidth / 2;
        int y = centerY - imageHeight / 2;

        // top part
        canvas.save();
        canvas.clipRect(0, 0, getWidth(), centerY);
        canvas.drawBitmap(image, x, y, paint);
        canvas.restore();

        // bottom part
        canvas.save();

        if (degree < 90) {
            canvas.clipRect(0, centerY, getWidth(), getHeight());
        } else {
            canvas.clipRect(0, 0, getWidth(), centerY);
        }

        camera.save();
        camera.rotateX(degree);
        canvas.translate(centerX, centerY);
        camera.applyToCanvas(canvas);
        canvas.translate(-centerX, -centerY);
        camera.restore();

        canvas.drawBitmap(image, x, y, paint);
        canvas.restore();
    }
}
~THE END~
Share this post
Twitter
Google+
Facebook
Reddit
LinkedIn
StumbleUpon
Email