Android Custom View 102 (Part II)
More about Paint

In this post, we will be focusing on the Paint.
Color
The color in Paint has 3 parts: basic color, color filter and xfermode.
Basic color
There are 2 ways to set color in Paint: use setColor() and use Shader.
Set color directly
Two methods can be used:
paint.setColor(Color.parseColor("#B90E83");
paint.setARGB(100, 255, 0, 0);
There is no difference, pick whichever you like.
Set color using Shader
There are different types of Shader, let’s look them one by one.
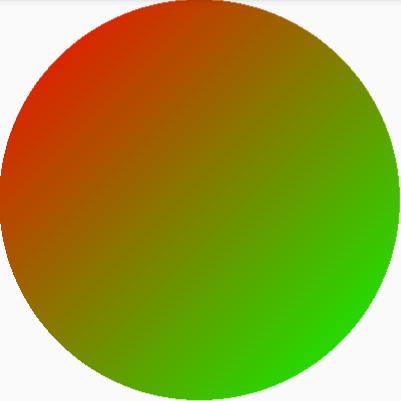
LinearGradient Shader
Paint paint = new Paint();
Shader shader = new LinearGradient(0, 0, 400, 400, Color.RED, Color.GREEN, Shader.TileMode.CLAMP);
paint.setShader(shader);
...

@Override
protected void onDraw(Canvas canvas) {
    super.onDraw(canvas);
    canvas.drawCircle(200, 200, 200, paint);
}
Point (0, 0) is RED, point (400, 400) is GREEN, and the area in between is a linear transition between the two colors.
The TileMode needs more explanation.
CLAMP
Replicate the edge color if the shader draws outside of its original bounds.
shader = new LinearGradient(0, 0, 100, 100, Color.RED, Color.BLUE, Shader.TileMode.CLAMP);

...

@Override
protected void onDraw(Canvas canvas) {
    super.onDraw(canvas);
    canvas.drawRect(0, 0, 400, 400, paint);
}
The shader defines area between (0, 0) and (100, 100). But the rectangle is from (0, 0) to (400, 400), which is outside of the shader’s bounds.
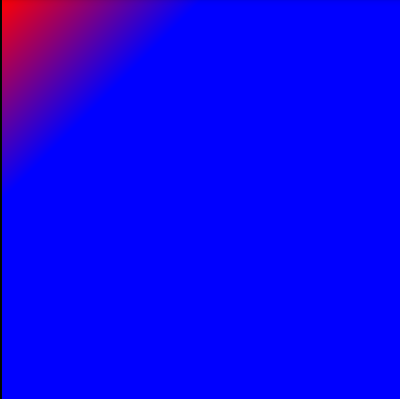
As shown in the picture, the area outside of shader replicates the edge color of the shader BLUE.
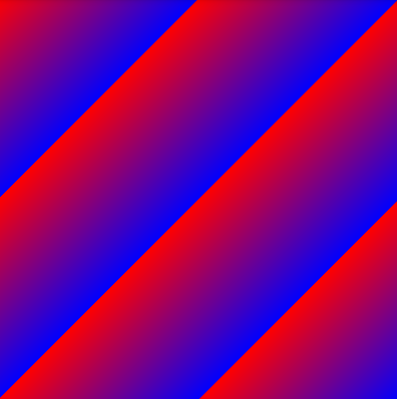
Let’s change the mode to REPEAT.
Now MIRROR.

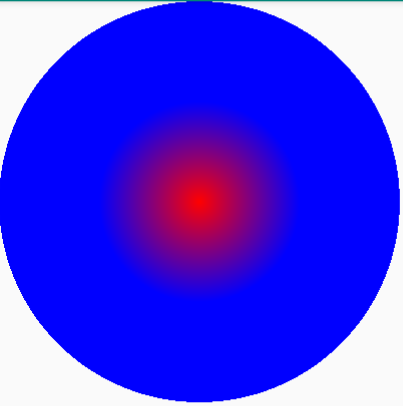
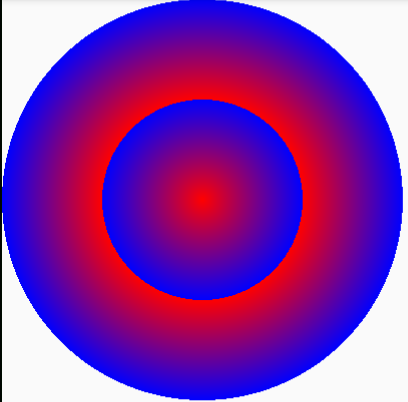
RadialGradient Shader
This is easy to understand, look at the example:
shader = new RadialGradient(200, 200, 100, Color.RED, Color.BLUE, Shader.TileMode.CLAMP);
paint.setShader(shader);

...

@Override
protected void onDraw(Canvas canvas) {
    super.onDraw(canvas);
    canvas.drawCircle(200, 200, 200, paint);
}
By changing the TileMode we can get the following:
REPEAT
MIRROR

SweepGradient Shader
This one looks like a radar.
shader = new SweepGradient(200, 200, Color.RED, Color.BLUE);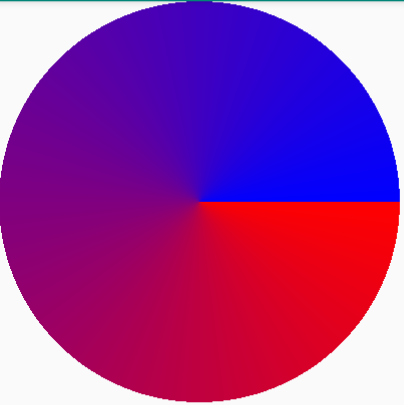
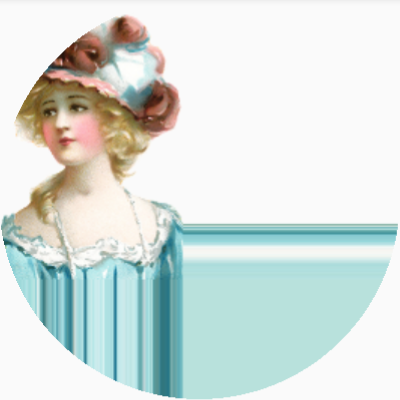
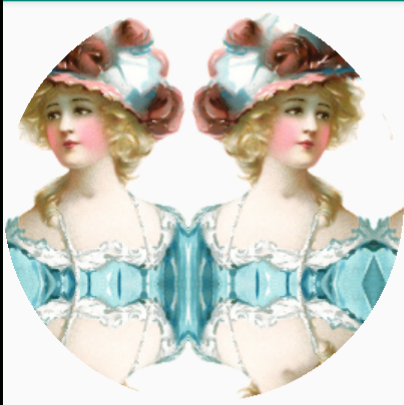
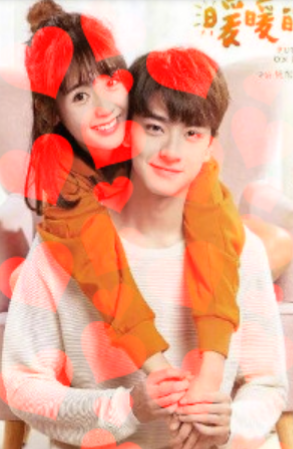
Bitmap Shader
Finally this is not a gradient shader.
Bitmap bitmap = BitmapFactory.decodeResource(getResources(), R.drawable.lady);

shader = new BitmapShader(bitmap, CLAMP, CLAMP);

...

@Override
protected void onDraw(Canvas canvas) {
    super.onDraw(canvas);
    canvas.drawCircle(200, 200, 200, paint);
}
REPEAT
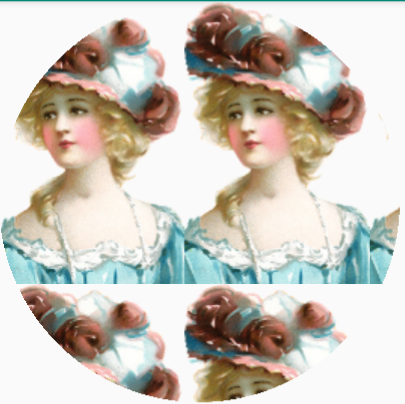
MIRROR
Compose Shader
We can use ComposeShader to combine 2 shaders.
Here is a BitmapShader:
imageShader = new BitmapShader(image, REPEAT, REPEAT);
paint.setShader(imageShader);
...

@Override
protected void onDraw(Canvas canvas) {
    super.onDraw(canvas);
    canvas.drawRect(0, 0, imageWidth, imageHeight, paint);
}
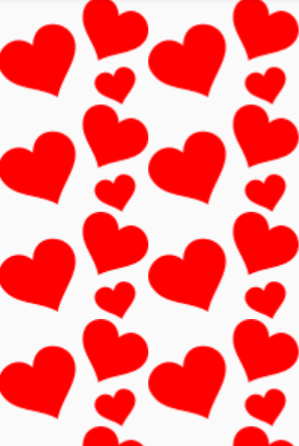
Here is another image shader:
heartShader = new BitmapShader(heart, REPEAT, REPEAT);
paint.setShader(heartShader);
...

@Override
protected void onDraw(Canvas canvas) {
    super.onDraw(canvas);
    canvas.drawRect(0, 0, imageWidth, imageHeight, paint);
}
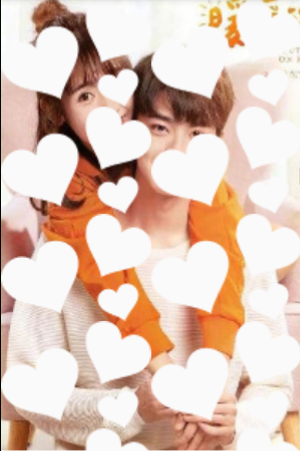
Now combine the two shaders:
imageShader = new BitmapShader(image, REPEAT, REPEAT);
heartShader = new BitmapShader(heart, REPEAT, REPEAT);
composeShader = new ComposeShader(imageShader, heartShader, PorterDuff.Mode.SRC_OVER);

paint.setShader(composeShader);
...

@Override
protected void onDraw(Canvas canvas) {
    super.onDraw(canvas);
    canvas.drawRect(0, 0, imageWidth, imageHeight, paint);
}
Note that
imageShader: The colors from this shader are seen as the “dst” by the mode
heartShader: The colors from this shader are seen as the “src” by the mode
Actually there different ways to combine the 2 shaders, it is controlled by PorterDuff.Mode. Let’s see some more examples:
DST_OUT
DST_IN
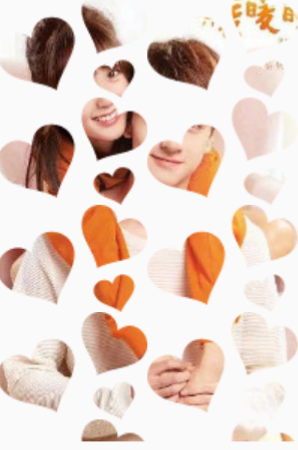
LIGHTEN
There are many others, please check the official documentation if you are interested.
Aside from setColor() and setShader(), Paint can use ColorFilter as a second layer to process the colors.
Filter
There are 3 subclasses of ColorFilter: LightingColorFilter, PorterDuffColorFilter and ColorMatrixColorFilter.
LightingColorFilter
It’s constructor is ColorMatrixColorFilter(int mul, int add), where mul and add are the same int values as the colors. The result color can be calculated as follows:
R’ = R * mul.R / 0xff + add.R
G’ = G * mul.G / 0xff + add.G
B’ = B * mul.B / 0xff + add.B
The simplest filter is to not filter at all:
filter = new LightingColorFilter(0xffffff, 0x000000);
paint.setColorFilter(filter);
Put in the values we get:
R’ = R * 0xff / 0xff + 0x00 = R
G’ = G * 0xff / 0xff + 0x00 = G
B’ = B * 0xff / 0xff + 0x00 = B
OK, let’s remove the RED color:
filter = new LightingColorFilter(0x00ffff, 0x000000);
paint.setColorFilter(filter);
R’ = R * 0x00 / 0xff + 0x00 = 0x00

Or we can enhance the RED color:
filter = new LightingColorFilter(0xffffff, 0x300000);
paint.setColorFilter(filter);
R’ = R * 0xff / 0xff + 0x30

PorterDuffColorFilter
We have covered PorterDuff mode before, it still works the same, just now it is applied to a color.
I show only one example here:
filter = new PorterDuffColorFilter(Color.RED, PorterDuff.Mode.LIGHTEN);
paint.setColorFilter(filter);
ColorMatrixColorFilter
This is pretty advanced color filter, it is also very powerful. It uses a ColorMatrix to filter the colors:
[ a, b, c, d, e,
f, g, h, i, j,
k, l, m, n, o,
p, q, r, s, t ]
And the calculation is like:
R’ = aR + bG + cB + dA + e;
G’ = fR + gG + hB + iA + j;
B’ = kR + lG + mB + nA + o;
A’ = pR + qG + rB + sA + t;
So basically you can use this to do anything.
XferMode
The last layer of color processing in Paint is Transfer Mode. Simply put, it takes the thing you are going to draw as SRC, and the things already drawn as DST, and pick one of the PorterDuff.Mode to deal with color combination.
Its usage is very simple. Let’s look at one view without any XferMode set.
@Override
public void draw(Canvas canvas) {
    super.draw(canvas);

    // Draw background color
    canvas.drawColor(Color.GRAY);

    // Draw yello circle
    paint.setColor(Color.YELLOW);
    canvas.drawCircle(100, 100, 100, paint);

    // Draw blue rectangle
    paint.setColor(Color.BLUE);
    canvas.drawRect(100, 100, 300, 200, paint);
}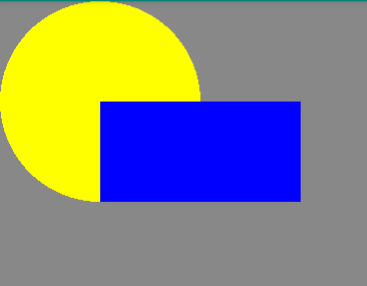
As expected, the thing drawn later will draw on top of the previous things on the canvas. Most of the time this is what we want, but we can also mixin the PorterDuff.Mode to have more control as to how things get combined.
Let’s put in the DST_OUT before drawing the rectangle:
@Override
public void draw(Canvas canvas) {
    super.draw(canvas);

    // Draw background color
    canvas.drawColor(Color.GRAY);

    // Draw yello circle
    paint.setColor(Color.YELLOW);
    canvas.drawCircle(100, 100, 100, paint);

    // Set XferMode
    paint.setXfermode(new PorterDuffXfermode(PorterDuff.Mode.DST_OUT));

    // Draw blue rectangle
    paint.setColor(Color.BLUE);
    canvas.drawRect(100, 100, 300, 200, paint);

    // Clear xfermode
    paint.setXfermode(null);
}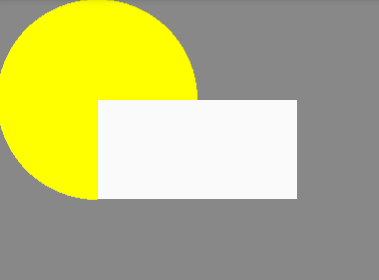
DST_OUT means:
Keeps the destination pixels that are not covered by source pixels. Discards destination pixels that are covered by source pixels. Discards all source pixels.
But wait, this is not exactly what we have in mind. The part of the circle that is covered by the rectangle now becomes white, this is correct. But why the background color also becomes white?
To understand this, we have to introduce the layers. When we draw stuff directly on the canvas, everything is drawn in one layer. That is to say, the background color, the circle and the rectangle are all on the same default layer. So before the rectangle is drawn, both the background color and the cirle are treated as DST, so that is why the background also becomes white.
By the way, the white color we see is not the color of the view, it is because the color taken out becomes transparent, and the activity’s background color is white.
Is there a way to preserve the background color?
The answer is yes, we can use an extra layer to do it.
@Override
public void draw(Canvas canvas) {
    super.draw(canvas);

    // Draw background color
    canvas.drawColor(Color.GRAY);

    // All drawing from now on will be on another "layer"
    int saved = canvas.saveLayer(null, null, Canvas.ALL_SAVE_FLAG);

    // Draw yellow circle
    paint.setColor(Color.YELLOW);
    canvas.drawCircle(100, 100, 100, paint);

    // Set XferMode
    paint.setXfermode(new PorterDuffXfermode(PorterDuff.Mode.DST_OUT));

    // Draw blue rectangle
    paint.setColor(Color.BLUE);
    canvas.drawRect(100, 100, 300, 200, paint);

    // Clear xfermode
    paint.setXfermode(null);

    // Merge the new "layer" back into the default "layer"
    canvas.restoreToCount(saved);
}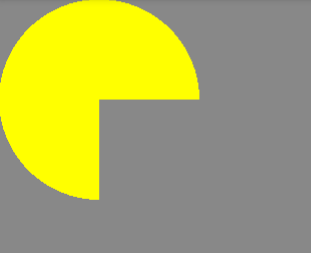
This looks better. Let’s see what happens.
- Draw the background color on the default layer.
- Set up a new layer.
- Draw the circle on the new layer.
- Set XferMode.
- Draw the Rectangle on the new layer.
- Merge the new layer back to the default layer.
Effects
AntiAlias
Let’s see the following example.
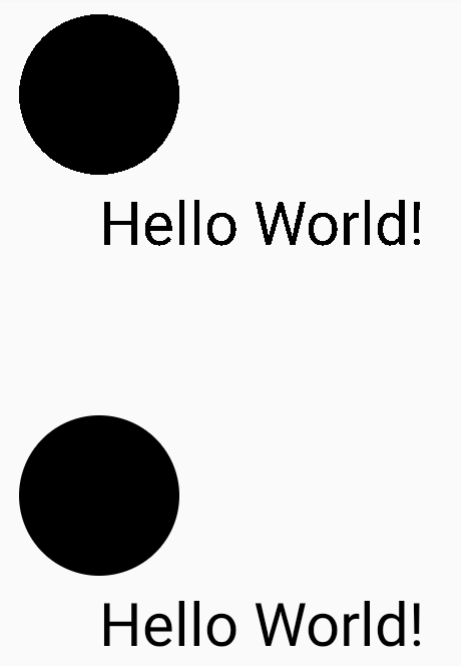
With AntiAlias turned on, it looks much smoother. And most of the time I do recommend to turn on anti alias.
Two ways to turn on the AntiAlias:
Paint paint = new Paint(Paint.ANTI_ALIAS_FLAG);
paint.setAntiAlias(true);
Style
There are three Paint.Style: FILL, STROKE and FILL_AND_STROKE.
This is very simple, I do not give examples here.
Stroke Style
There are 4 methods to set the style of the stroke: setStrokeWidth(float width),
setStrokeCap(Paint.Cap cap), setStrokeJoin(Paint.Join join), setStrokeMiter(float miter).
setStrokeWidth
setStrokeWidth(float width) sets the width of the stroke line in pixel, default value is 0.
Let’s see an example of stroke width 0px, 10px, 20px.
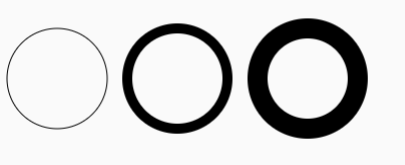
As you can see, the default 0px stroke width still draws a fine line, and the actual width is 1px. You may ask what is the difference between 0 and 1?
This has something to do with canvas transformation. For example, the canvas can be zoomed in 2 times. In this case, the line with 1px width will be shown as 2px. But if the width is set to 0px, it will not be affected by such transformations. So the default 0px width is also called “hairline mode”.
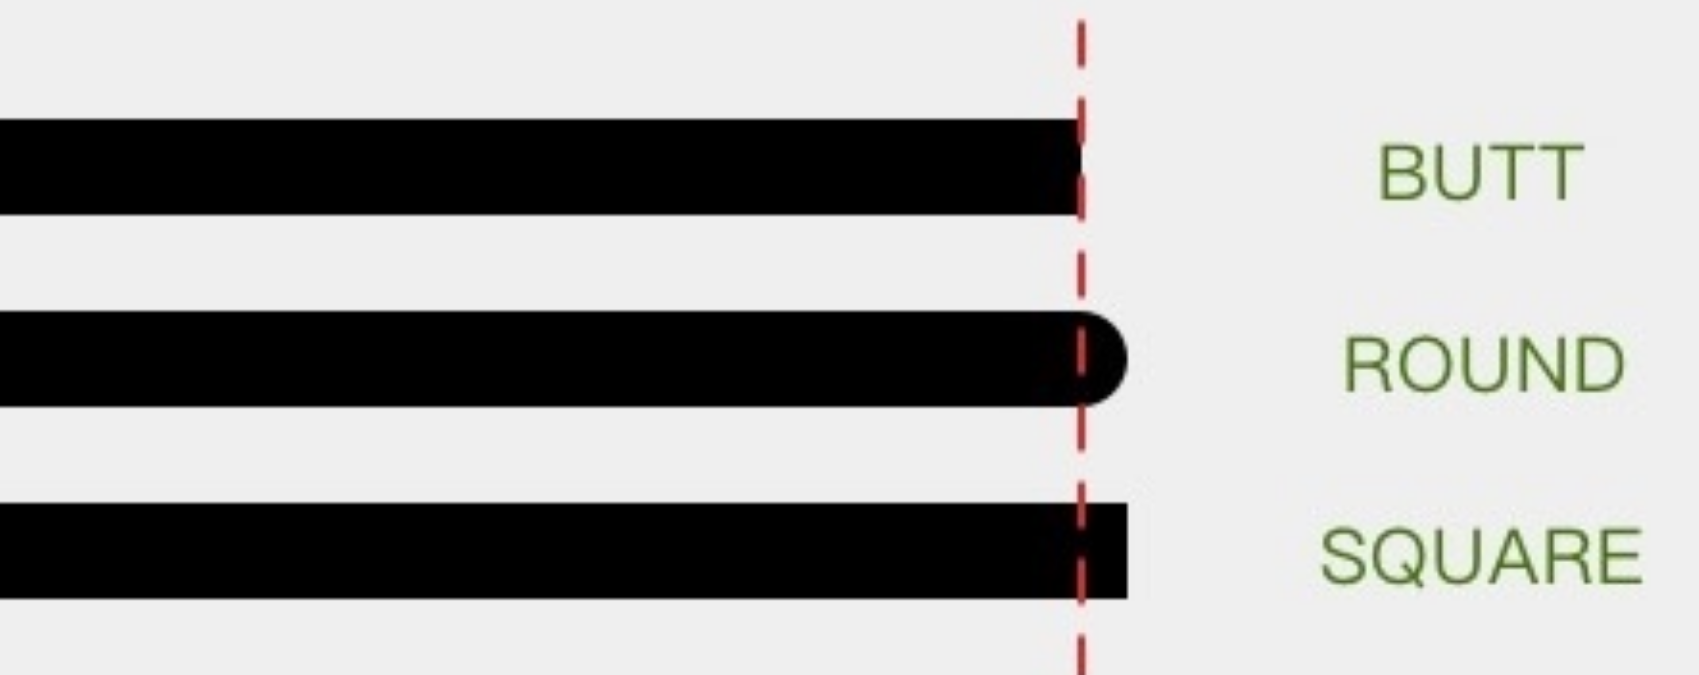
setStrokeCap
setStrokeCap(Paint.Cap cap) accepts 3 types of Caps: BUTT, ROUND and SQUARE.
The difference can be shown easily through a picture.
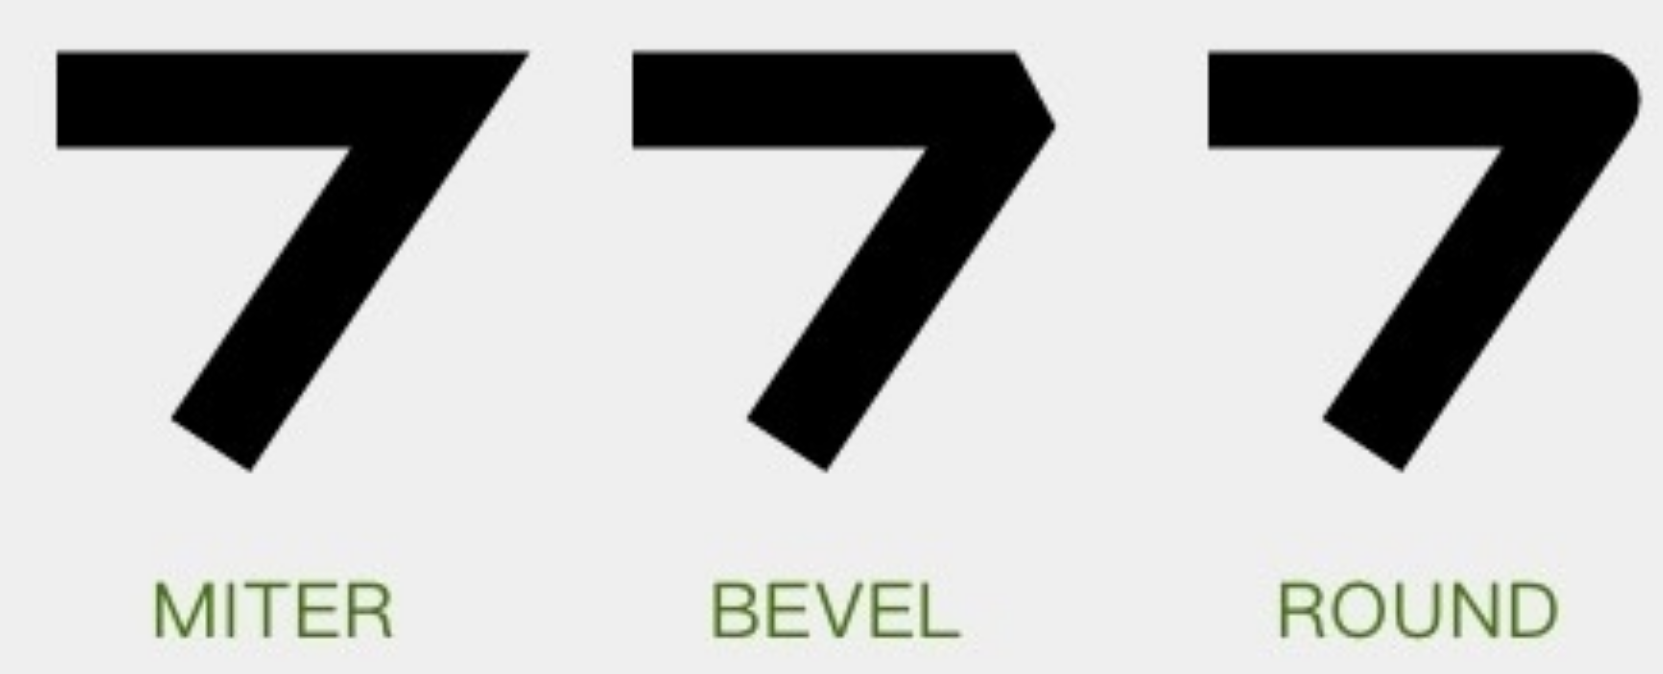
setStrokeJoin
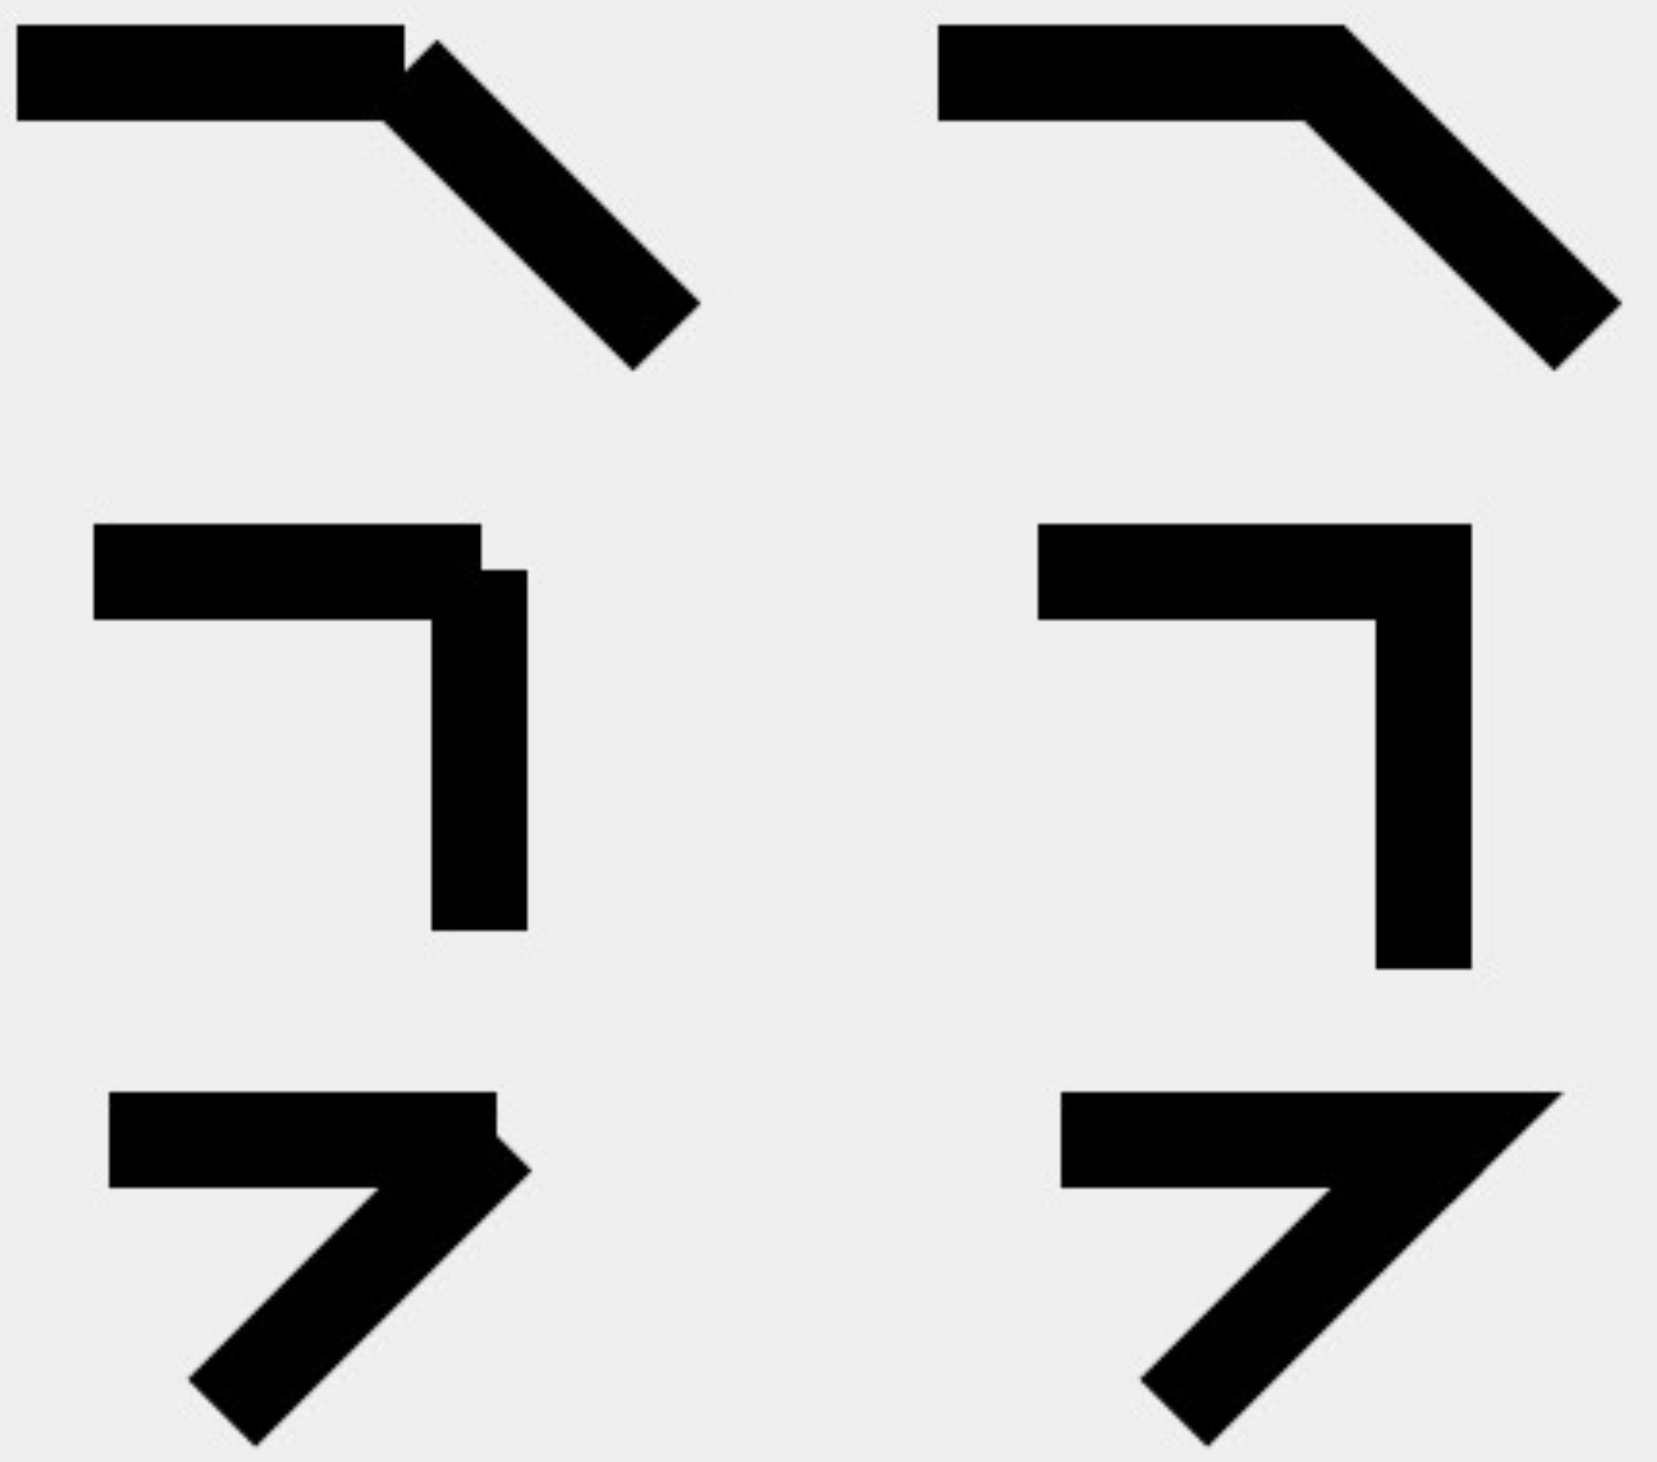
setStrokeJoin(Paint.Join join) takes 3 values: MITER, BEVEL and ROUND. The default value is MITER.
setStrokeMiter
setStrokeMiter(float miter).
Set the paint’s stroke miter value. This is used to control the behavior of miter joins when the joins angle is sharp.
In order to understand this, we have to understand how miter works. Again, see this picture:
But there is a problem, if the angle of the two lines is too sharp, the joint becomes very long.
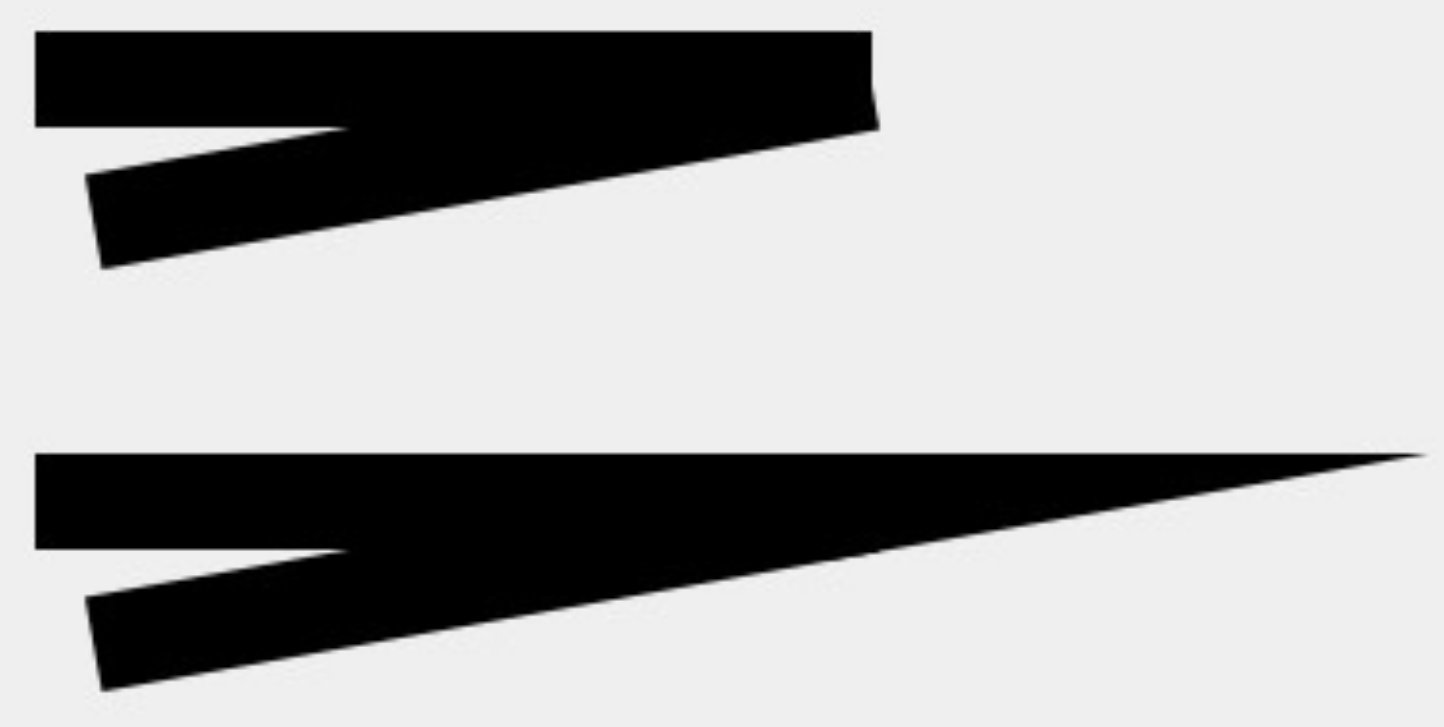
So if the miter is over certain value, it will automatically use BEVEL.
Let’s now see how this miter value is calculated:
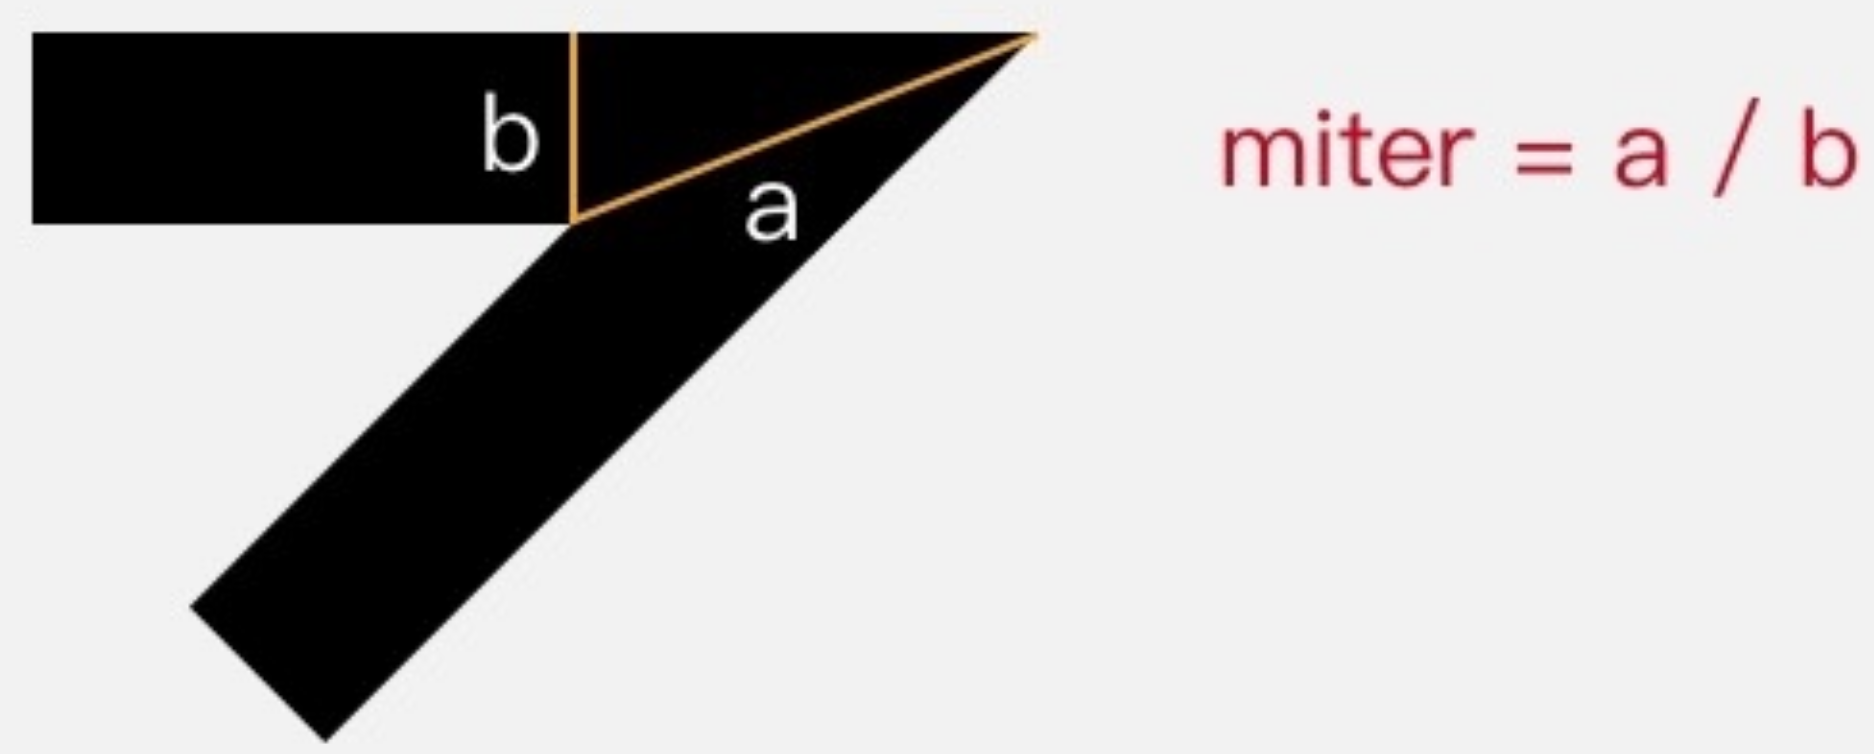
The default value is 4, which is about 29 degree.
Color Optimization
There are two methods in Paint for color optimization: setDither(boolean dither) and setFilterBitmap(boolean filter).
setDither(boolean dither)
Dithering is used in computer graphics to create the illusion of “color depth” in images with a limited color palette.
Let’s see what this means in practice.
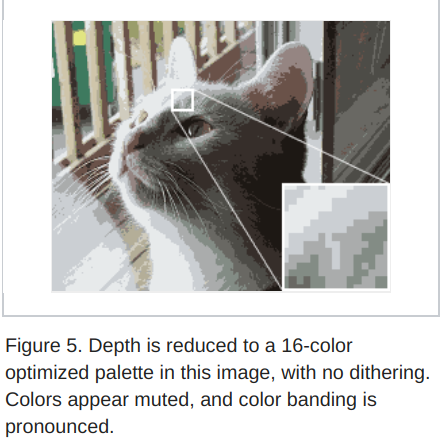
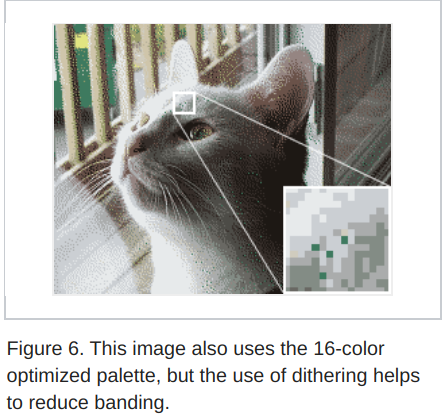
To enable dithering in Android is simple, just setDither(true).
But this is not so useful nowadays as the Android default color depth is 32 bit ARGB_8888, which is already pretty good.
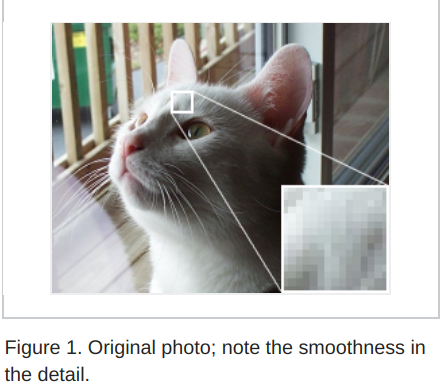
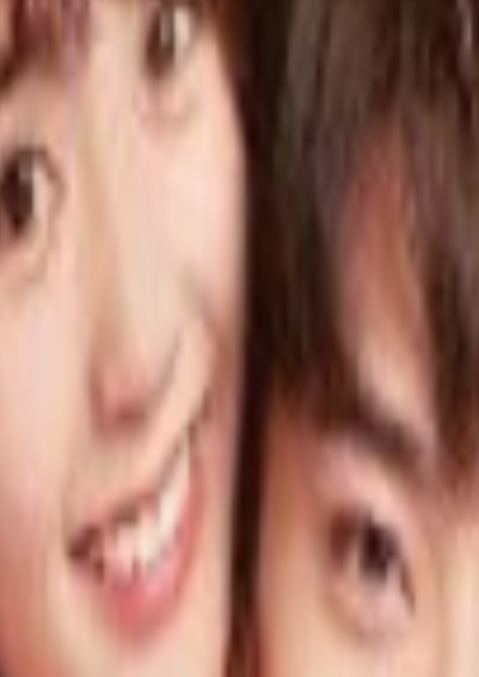
setFilterBitmap(boolean filter)
This method can turn on Bilinear Filtering.
We can see the effect of applying this filter by painting a small part of an image to an bigger area on the screen.
Without filtering:
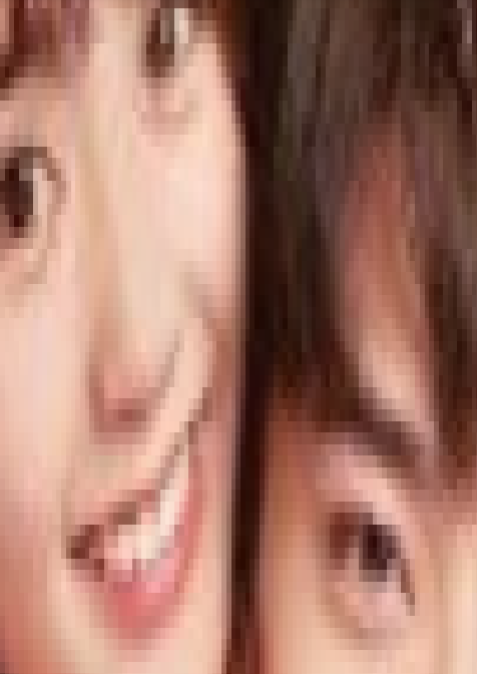
With the filting:
setPathEffect(PathEffect effect)
Use PathEffect to style the contour of the shape. It can be used to any shape drawing methods: drawCircle(), drawLine() and drawPath() etc.
There are 6 PathEffect, divided into two categories: single effect and combined effect. Single effects are: CornerPathEffect DiscretePathEffect DashPathEffect
PathDashPathEffect, and combined effects are: SumPathEffect and ComposePathEffect.
CornerPathEffect
Make every corner round.
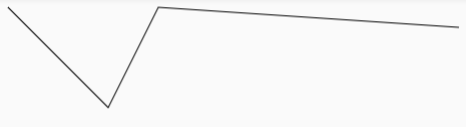
Let’s draw a simple path:
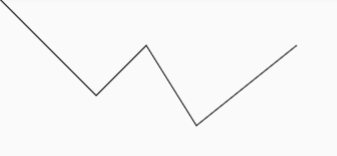
Now set a CornerPathEffect to the paint:
pathEffect = new CornerPathEffect(50);
paint.setPathEffect(pathEffect);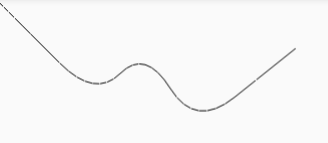
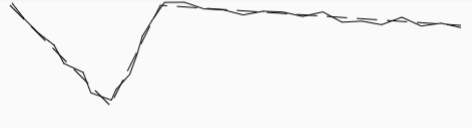
DiscretePathEffect
Chop the path into lines of segmentLength, randomly deviating from the original path by deviation.
Let’s see the previous example with this effect.
pathEffect = new DiscretePathEffect(10, 5);
paint.setPathEffect(pathEffect);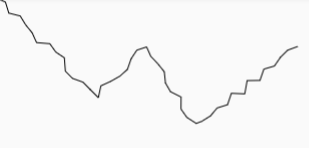
DashPathEffect
DashPathEffect(float[] intervals, float phase).
Let’s see an example first:
pathEffect = new DashPathEffect(new float[]{50, 10, 20, 10}, 0);
paint.setPathEffect(pathEffect);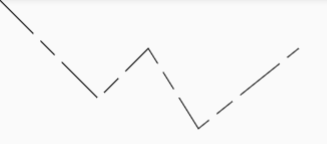
Now let’s explain the 2 params.
new float[]{50, 10, 20, 10} means first draw 50px solid line, then 10px space, then 20px solid line, finally 10px space. No matter how long the array is, it follows this pattern.(of course the array must be of even length).
The phase is a bit confusing, first let’s see the official doc:
phase is an offset into the intervals array (mod the sum of all of the intervals).
Basically we can use this to control the where the beginning of the path begins. For example, if we want to start with the first 10px space, we can set the phase to 50 (bypass the first 50px then start drawing).
As you can see from the picture, the beginning of the path is a 10px space.
PathDashPathEffect
PathDashPathEffect(Path shape, float advance, float phase, Style style) uses a path as dash.
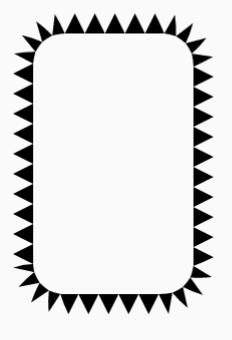
For example we can use a triangle path as dash.
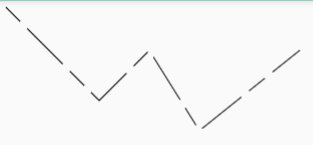
This is the orignial path:
Now we can add triangle dash to it.
paint = new Paint(Paint.ANTI_ALIAS_FLAG);
paint.setStyle(Paint.Style.STROKE);
// triangle dash
path = new Path();
path.moveTo(10, 0);
path.lineTo(20, 20);
path.lineTo(0, 20);
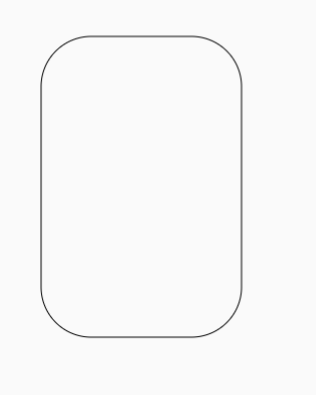
dashPath = new Path();
dashPath.addRoundRect(50, 50, 250, 350, 50, 50, Path.Direction.CW);
pathEffect = new PathDashPathEffect(path, 20, 0, PathDashPathEffect.Style.TRANSLATE);
paint.setPathEffect(pathEffect);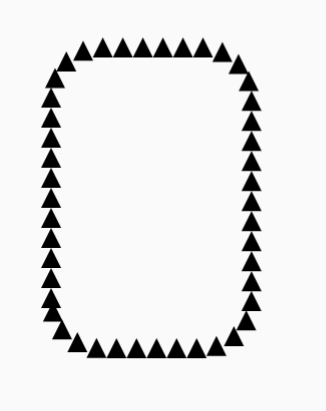
Let’s play with the Style.
ROTATE
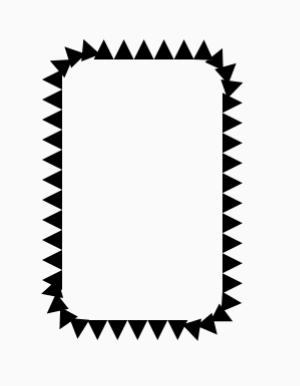
MORPH
SumPathEffect
SumPathEffect paints two paths together.
This is the original path:
The SumPathEffect has 2 PathEffect: a DashPathEffect and a DiscretePathEffect.
PathEffect dashEffect = new DashPathEffect(new float[]{20, 10}, 0);
PathEffect discreteEffect = new DiscretePathEffect(20, 5);
pathEffect = new SumPathEffect(dashEffect, discreteEffect);
paint.setPathEffect(pathEffect);
This is how it looks like after setting the SumPathEffect:
ComposePathEffect
This is also a composed PathEffect. But it applies PathEffect one after the other.
Let’s change the above example to use ComposePathEffect:
PathEffect dashEffect = new DashPathEffect(new float[]{20, 10}, 0);
PathEffect discreteEffect = new DiscretePathEffect(20, 5);
pathEffect = new ComposePathEffect(dashEffect, discreteEffect);
paint.setPathEffect(pathEffect);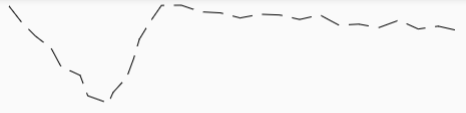
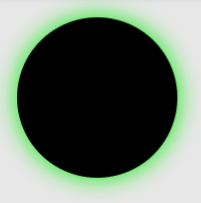
setShadowLayer
setShadowLayer(foat radius, foat dx, foat dy, int shadowColor)
This is very simple, checkout the example.
paint.setShadowLayer(20, 0, 0, Color.GREEN);

...

@Override
protected void onDraw(Canvas canvas) {
    super.onDraw(canvas);
    canvas.drawCircle(100, 100, 80, paint);
}
setMaskFilter(MaskFilter mask lter)
MaskFilter filters the entire image. The previous ColorFilter only filters the color.
BlurMaskFilter
There are 4 types of BlurMaskFilter.Blur: NORMAL, SOLID, INNER and OUTER.
Let’s see what they all look like.
Original Image

NORMAL

INNER

OUTER
SOLID

Share this post
Twitter
Google+
Facebook
Reddit
LinkedIn
StumbleUpon
Email