Android Custom Views 101 (Part I)
Learn about Androd Custom View and ViewGroup

Creating your own custom android views can be useful and daunting at the same time. For a long time there is nobody really talks about it in a approachable way, until this lady Huyen Tue Dao. Let’s try to follow her approach and create some custom view!
In this part, we will create a very simple timer view that takes up the whole screen and display the current time.
So let’s get started.
First thing first. There are 3 steps that views go through before they appear on the screen:
- Measure | onMeasure()
- Layout | onLayout()
- Draw | onDraw()
During the measure phase, the parent gives its children a set of constriants, and the children dicide how big they want to be within those constriants.
During the layout phase, each parent determines the final position and size of its children.
Once the measure and layout phases are complete, the parent will draw itself and request its children to do the same.
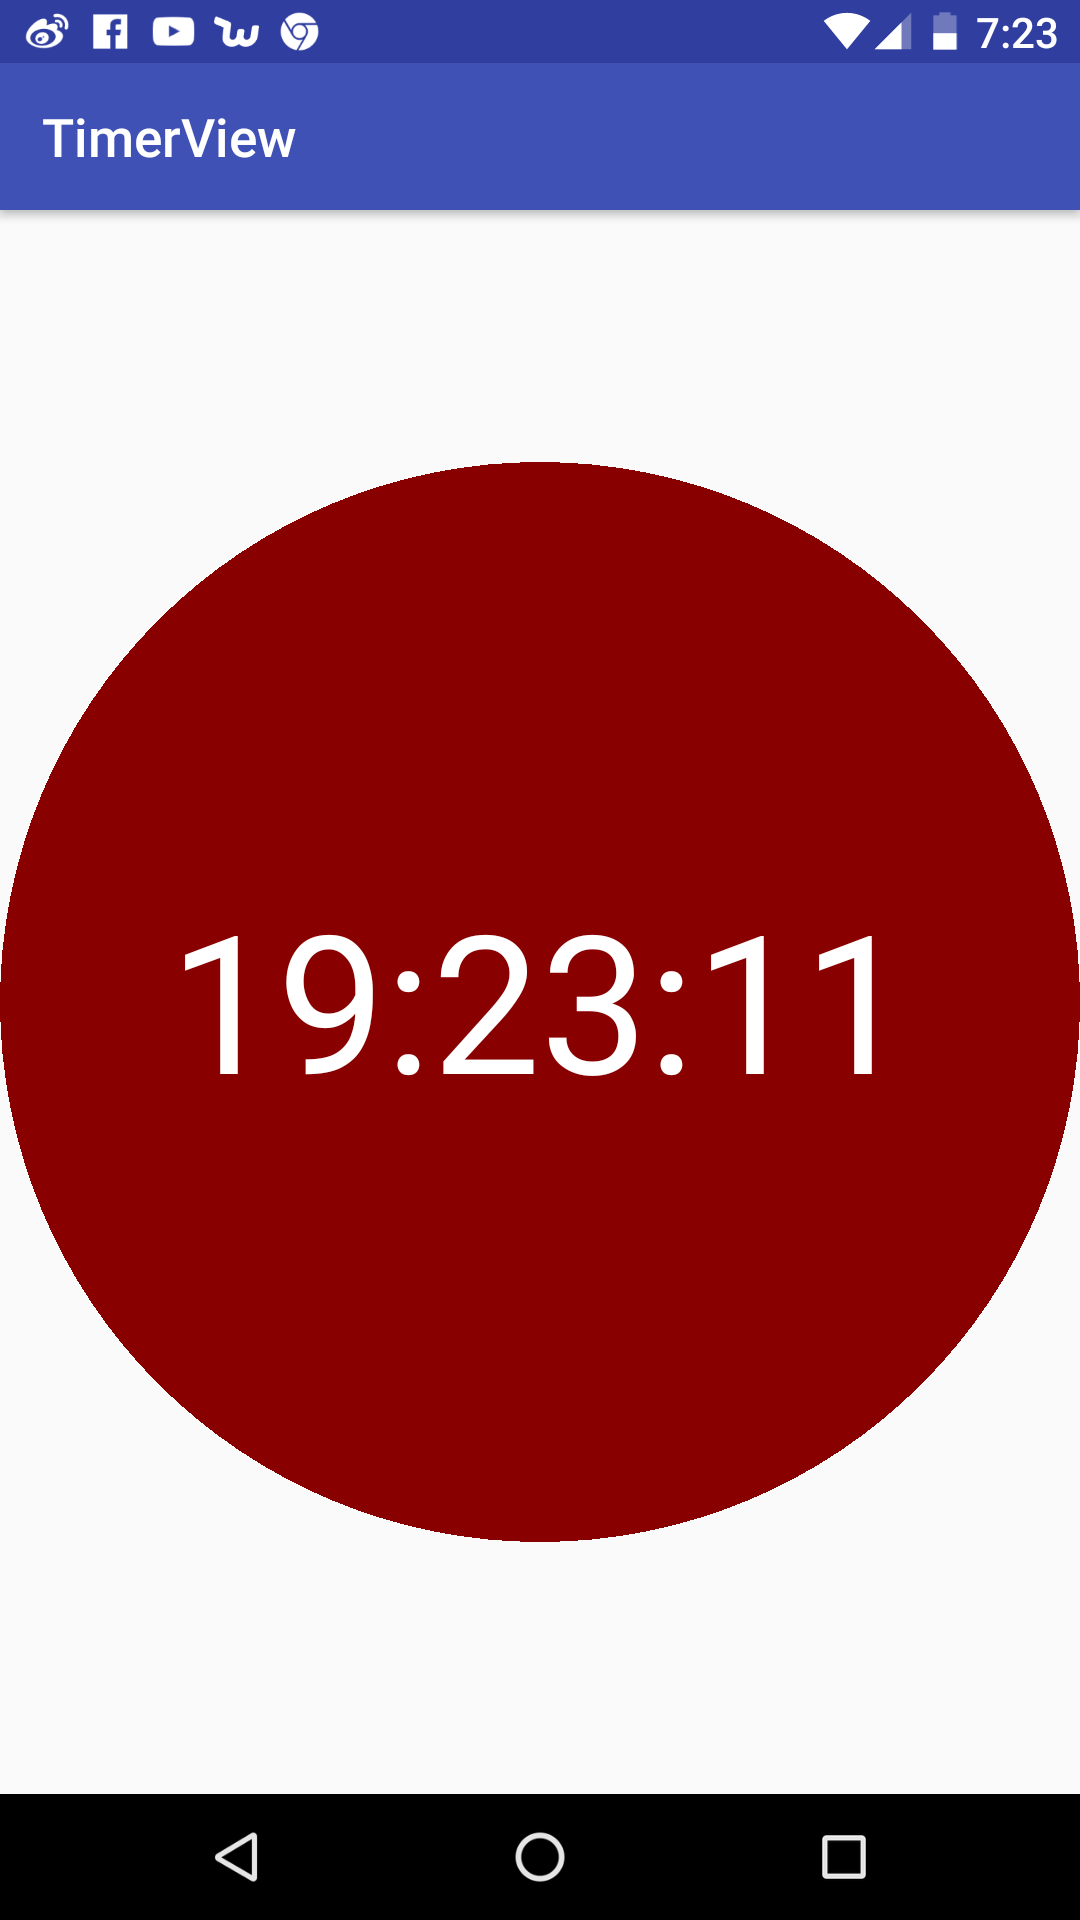
In this post, we will create a timer view that displays the time like a digital watch.
First, create a TimerView class that extends the android View class.
In it, we need to provide 2 custructors.
// This custructor is used when the TimerView gets created programatically
public TimerView(Context context) { ... }

// This custructor is used when the TimerView gets created through xml
public TimerView(Context context, AttributeSet attrs) { ... }
In order to draw stuff, we need something called Paint.
// Paint for drawing background
backgroundPaint = new Paint();
backgroundPaint.setColor(Color.parseColor("#880000"));

// Paint for drawing text
numberPaint = new TextPaint(Paint.ANTI_ALIAS_FLAG);
numberPaint.setColor(ContextCompat.getColor(getContext(), android.R.color.white));
Important things to keep in mind: Drawing operations are in pixels, but you should think in Density Independent Pixels (DP) or Scaled Pixels (SP), that means whenever you pass in the pixel value, you need to multiply that by display density, DPs/SPs * display density.
So if we want the text to 64sp, we can do like this: ssh-keygen -t rsa -b 4096 -C “your_email@example.com”
numberPaint.setTextSize(64f * getResources().getDisplayMetrics().scaledDensity);Next we get the center point and radius of the background circle:
// The circle will be in the center of the canvas
int canvasWidth = canvas.getWidth();
int canvasHeight = canvas.getHeight();

float centerX = Math.round(canvasWidth * 0.5f);
float centerY = Math.round(canvasHeight * 0.5f);

float radius = (canvasWidth < canvasHeight ? canvasWidth : canvasHeight) * 0.5f;
For drawing text, the origin is the left bottom of the text. So we have to calculate the x and y offsets like this:
String text = formatter.format(time);
float textOffsetX = numberPaint.measureText(text) * -0.5f;
// for some reason the ascent is negative
float textOffsetY = numberPaint.getFontMetrics().ascent * -0.4f;
Now we can draw the circle background and text:
canvas.drawCircle(centerX, centerY, radius, backgroundPaint);
canvas.drawText(text, centerX + textOffsetX , centerY + textOffsetY , numberPaint);
This completes the Part I, we have the timer view taken up the whole screen. In next part, we will take a look at how to properly implement onMeasure() so that it behaves better if is put inside some parent view.
Check out the source code here.
Share this post
Twitter
Google+
Facebook
Reddit
LinkedIn
StumbleUpon
Email